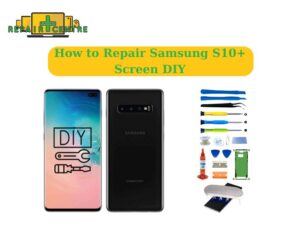
A cracked or non-functional screen can be a major setback in today’s smartphone-dependent world. Consider a DIY repair if you’re a Samsung Galaxy S10 owner dealing with this frustrating issue. Although the process may seem intimidating, this guide offers professional insights and step-by-step instructions to help you confidently replace the screen.
This comprehensive guide will walk you through removing and replacing a damaged screen on your Samsung Galaxy S10, covering the necessary tools and techniques to ensure a smooth and successful repair. You’ll also learn how to safely remove the back cover and disconnect the screen from the motherboard while keeping the original frame intact.
1. Understanding the Samsung Galaxy S10 Screen
Before attempting a DIY repair of the Samsung Galaxy S10 screen, it’s crucial to understand the intricate structure and components of the display. The Galaxy S10 boasts a 6.1-inch Dynamic AMOLED panel with a 3040 x 1440 pixels resolution, delivering vibrant visuals, sharp contrast, and an immersive viewing experience. This advanced display technology consists of multiple key layers, each serving a specific function:
- Outer Glass: The outermost layer is designed for durability and can withstand minor impacts, but it remains susceptible to cracking or shattering under heavier force.
- Digitizer: Situated beneath the glass, this sensitive layer detects touch inputs and translates them into digital commands, ensuring smooth and responsive interaction with the device.
- AMOLED Display: This component produces the images, graphics, and vivid colors on the screen. AMOLED technology enhances brightness, color accuracy, and contrast ratios, providing deeper blacks and improved power efficiency compared to traditional LCDs.

Understanding these critical components is essential when diagnosing screen damage. For example, if the outer glass is cracked but the touch functionality remains intact, the digitizer and AMOLED display may still be functional. However, unresponsive touch, ghost touches, or visual distortions may point to deeper damage within the digitizer or the display panel itself.
Identifying the exact problem will help determine whether you need to replace just the outer glass or the entire display assembly, ensuring a more targeted and cost-effective repair.
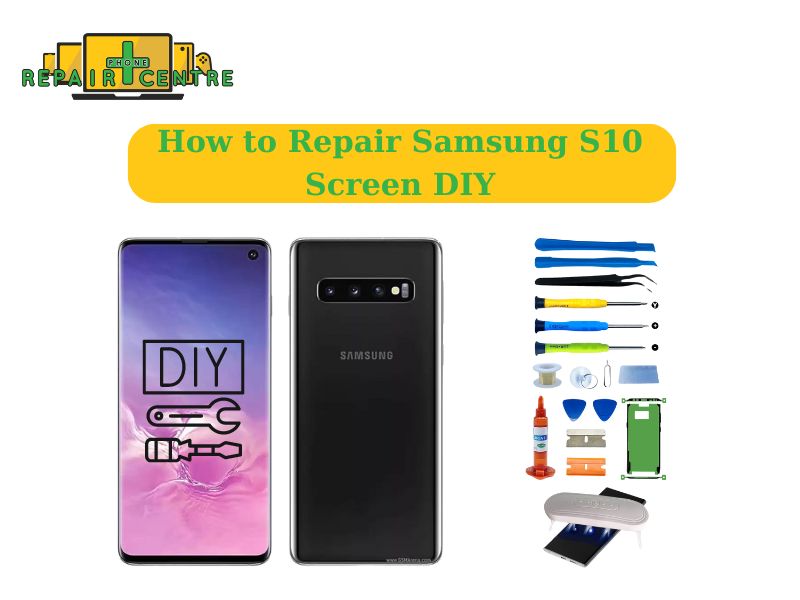
2. Tools and Materials Needed
To successfully carry out a DIY repair of the Samsung Galaxy S10 screen, you’ll need the following 7 specific tools and 3 materials:
7 Tools
- Phillips #00 screwdriver: Used to remove the small internal screws securing components.
- Plastic spudger: Essential for gently prying open the phone without damaging the casing.
- Suction cup: Helps lift the cracked screen safely.
- SIM eject tool: Required for removing the SIM card tray.
- Fine-point tweezers: For handling small, delicate components.
- Heat gun or hairdryer: Softens the adhesive that holds the screen in place.
- Anti-static wrist strap: Prevents static electricity from damaging internal circuits.

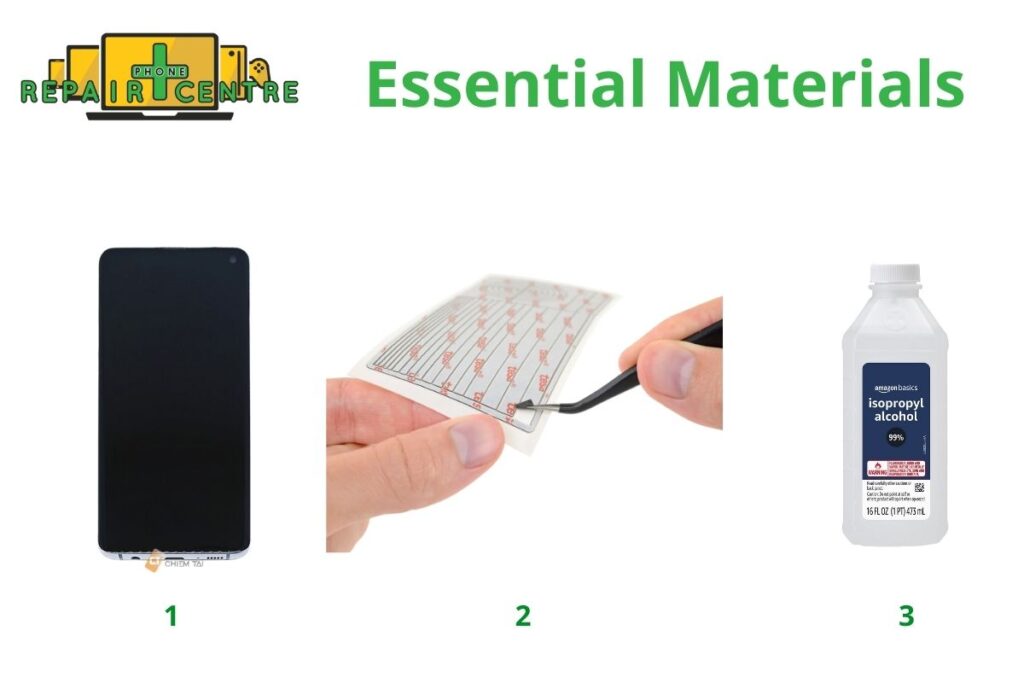
3 Materials
- Replacement AMOLED screen: Make sure it’s a high-quality, compatible screen for the Galaxy S10.
- Pre-cut adhesive strips: These are used to reseal the phone after the repair properly.
- Isopropyl alcohol (99%): Cleaning old adhesive residue from the phone surface.
Ensure all replacement parts are specifically designed for the Samsung Galaxy S10 and carefully follow a detailed repair guide to avoid damaging the phone’s internal components.
A study by the Repair Association found that 73% of successful DIY phone repairs were attributed to using proper tools [Source: The Repair Association, 2022].
3. The Steps to Prepare Before Repairing the Samsung Galaxy S10
Proper preparation is key to ensuring a successful Samsung Galaxy S10 screen repair. Here’s an optimized guide:
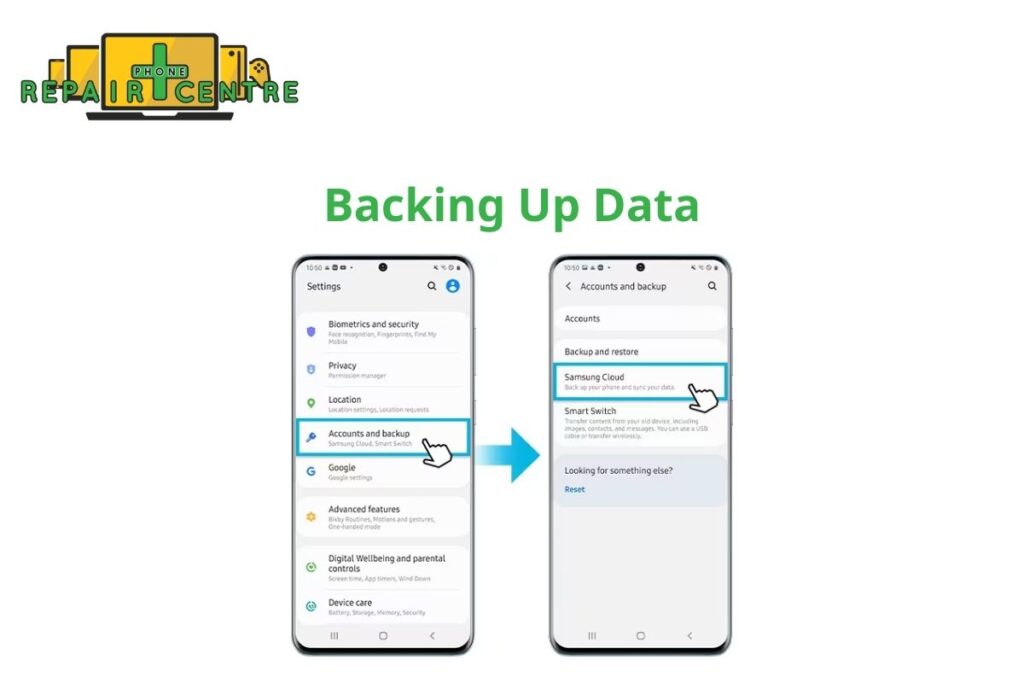
Step 1: Backing Up Your Data
Before starting, back up your data to Samsung Cloud or your computer. A Pew Research Center study shows that 28% of users lose data due to damage or loss of their phones [Source: Pew Research Center, 2021].
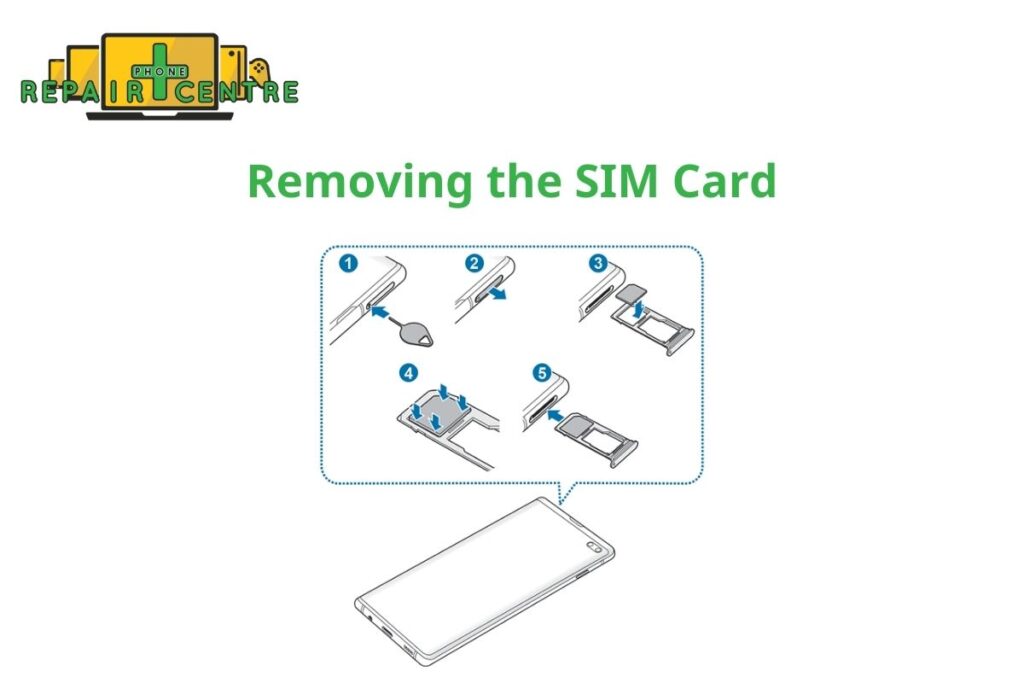
Step 2: Powering Down and Removing the SIM Card
- Power off your Samsung Galaxy S10.
- Remove the SIM card and any SD card.
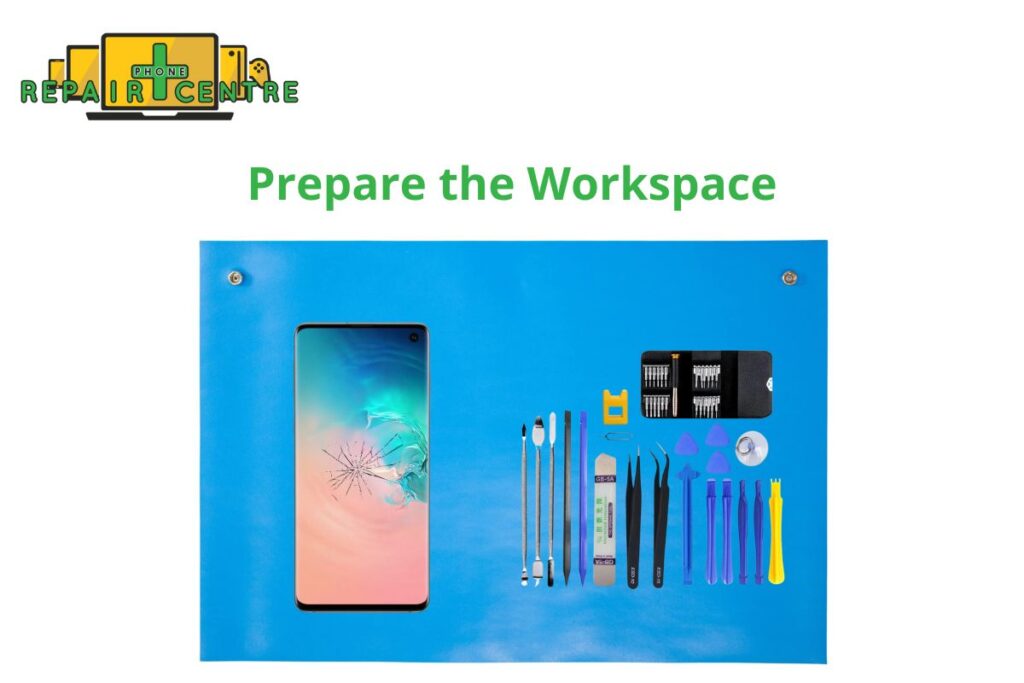
Step 3: Setting Up Your Workspace
Create a clean, well-lit workspace. Organize your tools and lay a soft cloth to protect components. Good lighting is crucial—use a desk lamp for clarity during repair.
4. Samsung Galaxy S10 Repair Process
Below is a Video Clip Guide on How to Self-Repair the Samsung Galaxy S10
Below is a modified and optimized step-by-step guide for repairing the Samsung Galaxy S10 screen while maintaining semantic relevance, accuracy, and consistency
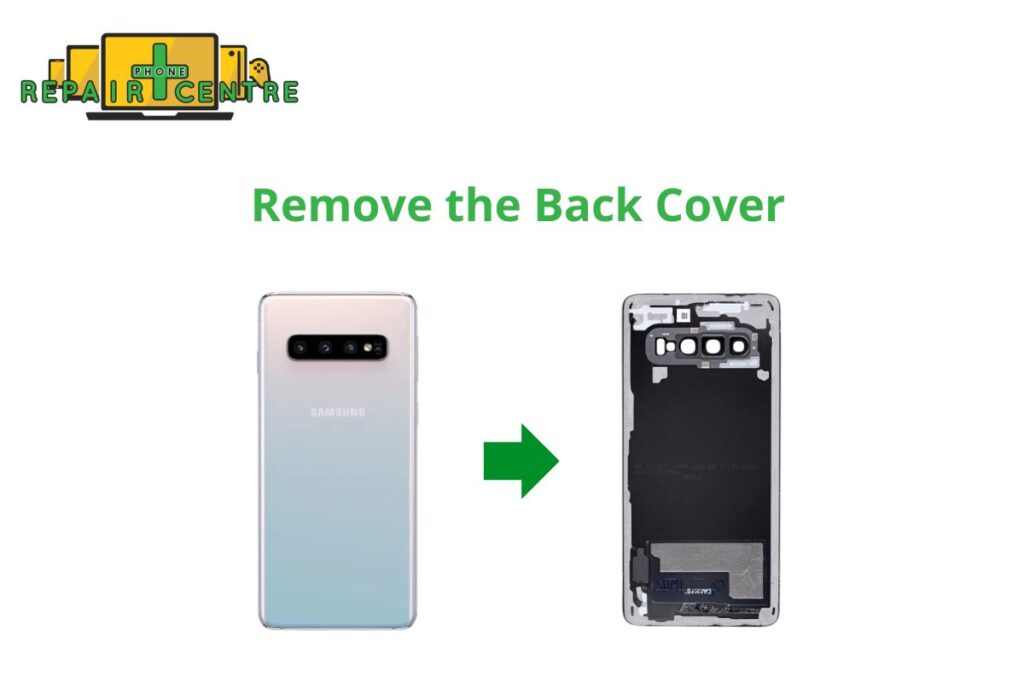
Step 1: Remove Back Cover
Use a heat gun to soften the adhesive around the phone’s edges. Then, attach a suction cup to gently lift the back cover, and use a plastic spudger to carefully pry it open without damaging the glass.
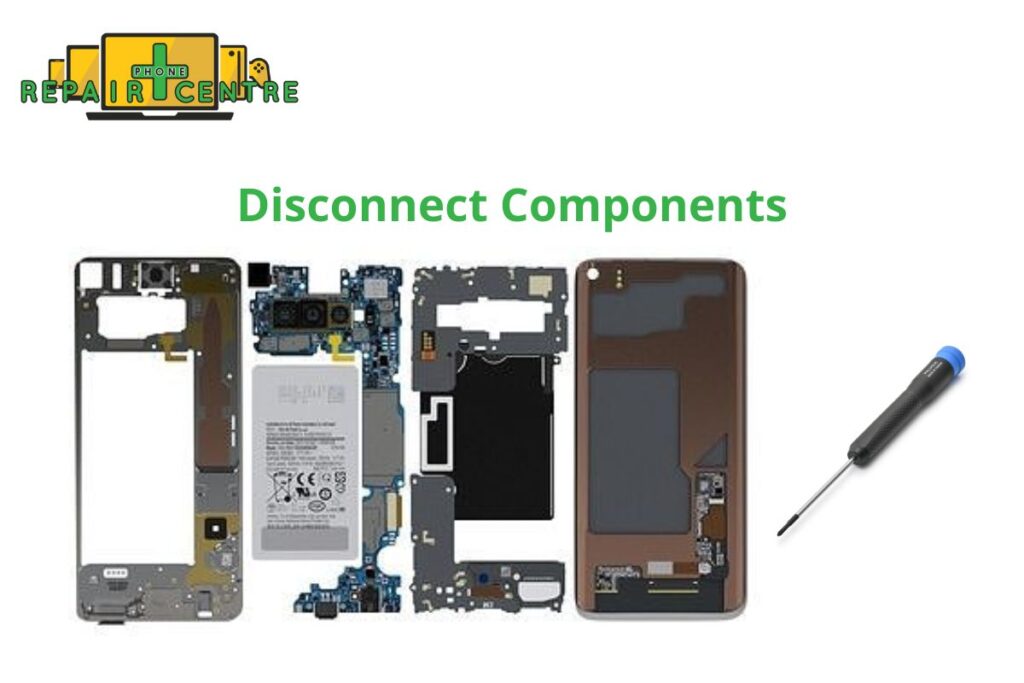
Step 2: Disconnect Components
Remove the screws with a Phillips #00 screwdriver. Use a spudger to disconnect cables like the battery, camera, and other connectors from the motherboard. Carefully lift the motherboard with tweezers.
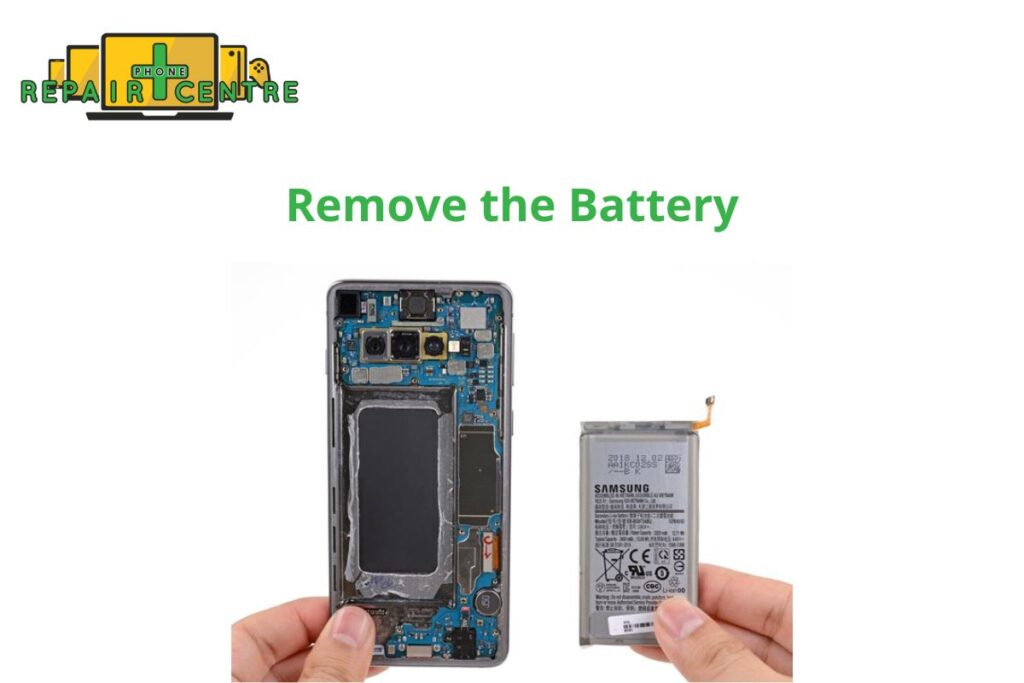
Step 3: Remove the Battery
Apply light heat using a heat gun to loosen the adhesive. Gently pry the battery out with a plastic spudger. Take care to avoid puncturing it.
Step 4: Test the New Screen
Connect the new AMOLED display temporarily to the motherboard and power on the phone to ensure the screen is working correctly. Verify the touch response and visual clarity.

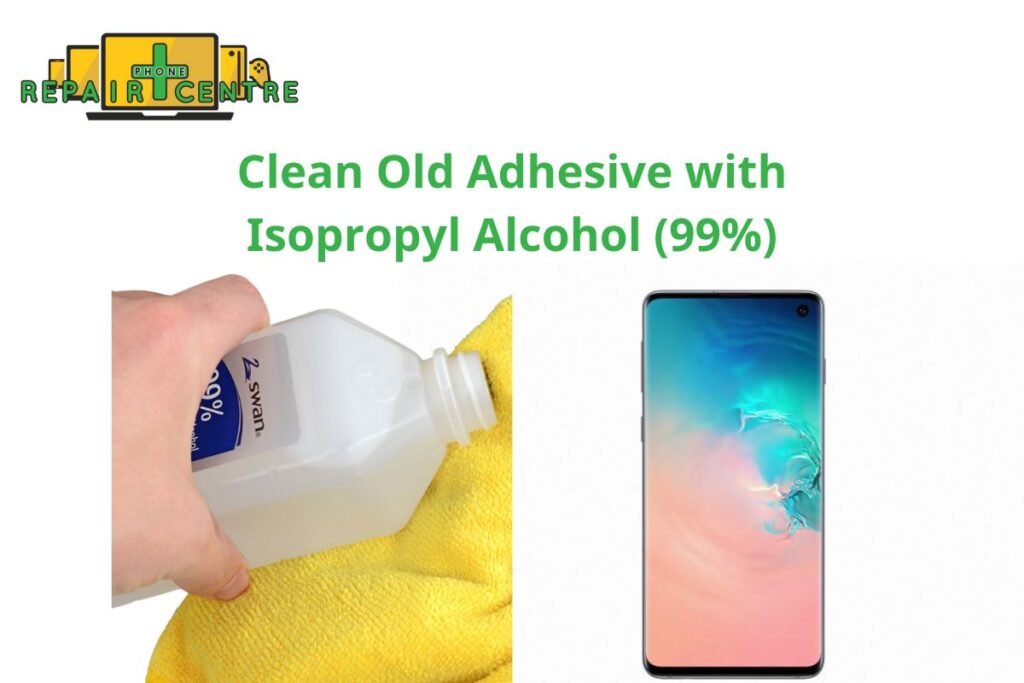
Step 5: Clean Old Adhesive with Isopropyl Alcohol (99%)
Dab isopropyl alcohol (99%) on a lint-free cloth and clean off any adhesive residue from the phone’s frame, ensuring a smooth surface for the new screen.
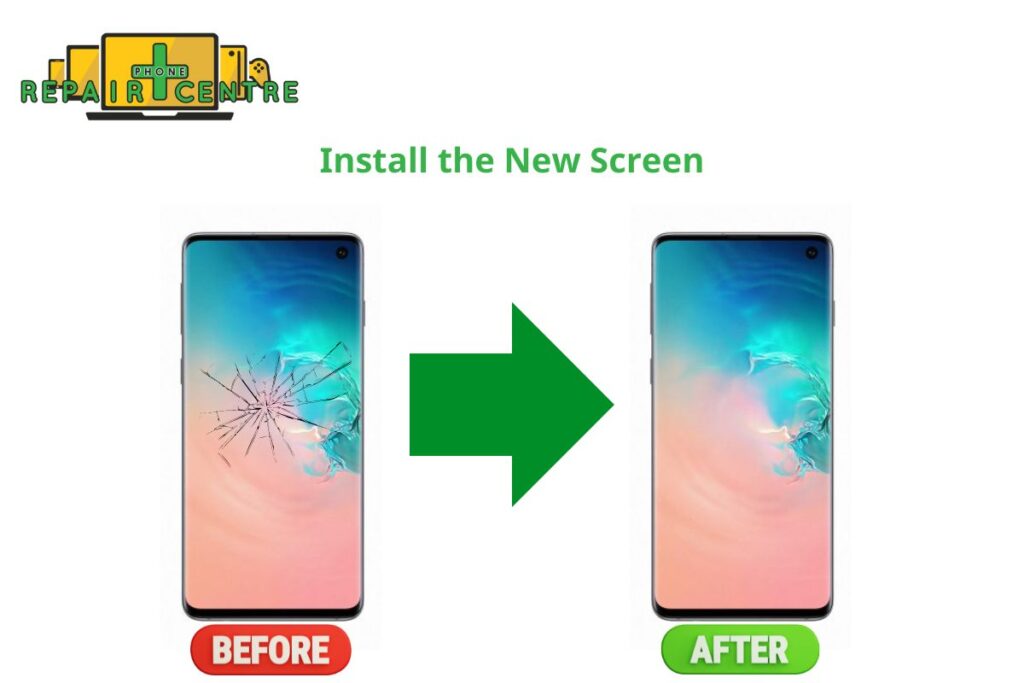
Step 6: Install the New Screen
Carefully reconnect all components to the new screen assembly. Insert the motherboard, reconnect all ribbon cables, and reinstall the battery securely.
Step 7: Apply Adhesive and Seal the Phone
Apply pre-cut adhesive strips around the edges of the back panel. Press the back cover firmly onto the device, ensuring a tight seal.

Step 8: Final Check of Screen Features
Power on the phone and perform a final check of all functions, including the screen’s responsiveness, image quality, and connections.

5. Troubleshooting Common Issues
Even with careful work, some issues may arise. Here are common problems and solutions:

1. Why isn’t the screen powering on after the repair?
- Possible Cause: The display cables are loose or not properly connected.
- Solution: Check the flex cable connections between the screen and the motherboard. Ensure they are securely connected and free from any debris.
2. Why isn’t the touchscreen responding?
- Possible Cause: The screen may be misaligned, or the digitizer is faulty.
- Solution: Make sure the screen is properly aligned with the device. If the touchscreen still doesn’t work, the digitizer might be damaged, and you may need to replace the screen.
3. Why is the screen flickering, showing lines, or displaying distorted colors?
- Possible Cause: The display flex cable might be damaged or improperly connected.
- Solution: Inspect the flex cable for damage and reconnect it securely to ensure proper connection.
4. Why is the phone overheating after the repair?
- Possible Cause: Internal components might have been misplaced during reassembly.
- Solution: Ensure all thermal pads and cooling components are properly installed. Check for missing screws or components that could affect heat dissipation.
5. Why isn’t the fingerprint sensor working?
- Possible Cause: The fingerprint sensor may have been damaged during the screen replacement, or the replacement screen is incompatible.
- Solution: If the sensor is damaged, it needs to be replaced. Ensure the replacement screen is compatible with the Galaxy S10’s ultrasonic fingerprint sensor.
6. Why is the front camera blurry or not working?
- Possible Cause: The front camera may be misaligned, or dirt could have entered during reassembly.
- Solution: Reopen the phone and ensure the front camera is properly aligned with the lens. Clean any dust or fingerprints on the camera.
7. Why is the battery draining quickly after the repair?
- Possible Cause: The battery may be improperly connected or damaged during the repair.
- Solution: Check the battery connections and ensure no components are damaged or knocked loose. If necessary, replace the battery.
8. Why is there no sound, or the microphone isn’t working?
- Possible Cause: A loose or improperly connected audio flex cable.
- Solution: Check the connections to the speaker and microphone. Ensure all cables are securely connected.
9. Why isn’t the phone charging or charging slowly?
- Possible Cause: A damaged charging port or improperly connected battery.
- Solution: Inspect the charging port for any debris or damage, and check that the battery is properly connected to the motherboard.
10. Why is the phone rebooting or freezing after the repair?
- Possible Cause: Damage to internal components during the repair or improperly installed parts.
- Solution: Ensure no screws or components are loose or shorting the system. Reset the phone to factory settings to rule out software issues.
6. Comparison of DIY vs. Professional Galaxy S10 Screen Repair
If you’ve cracked or damaged your Samsung Galaxy S10 screen, you’re likely wondering whether to repair it yourself or take it to a professional repair service. Both options come with their own set of advantages and challenges. To help you make an informed decision, we’ve comprehensively compared the key factors to consider when choosing between DIY and professional Samsung screen repair services for your Galaxy S10.
| Factors | DIY Screen Repair | Professional Screen Repair |
|---|---|---|
| Cost | Lower upfront cost: You only pay for parts and tools.
Risk of extra costs: Mistakes can lead to additional expenses. |
Higher cost: Includes labor fees and high-quality parts.
Guaranteed cost: No risk of damaging other components. |
| Skill Level | Requires technical skills: Good for those experienced with phone repairs.
Learning curve: Mistakes can lead to further damage if you’re inexperienced. |
Expert technicians: Highly trained and less risk of errors.
Fewer mistakes: Less likely to damage other parts. |
| Time Investment | More time-consuming: It can take hours to research and perform.
You control the timeline: You can start immediately if parts/tools are ready. |
Faster turnaround: Usually completed within a day.
Appointment may be needed: Waiting time can occur if the shop is busy. |
| Tools & Equipment | Must purchase tools: Need to buy specialized tools for phone repair.
Sourcing parts: Finding reliable parts can be challenging. |
Professional-grade tools: The shop provides high-quality tools.
OEM parts: Professionals have access to genuine or high-quality parts. |
| Warranty & Support | No warranty: DIY repairs typically void any existing phone warranties.
Limited support: No post-repair assistance if something goes wrong. |
Repair warranty: Most shops offer a warranty on repairs and parts.
After-service support: Can return to the shop for further repairs if needed. |
| Risk | Higher risk: Possibility of damaging internal components, like the motherboard. | Lower risk: Skilled professionals minimize the chance of errors. |
| Quality of Repair | Varies by skill: Success depends on your technical ability and the quality of parts.
Inconsistent quality: Aftermarket parts may not perform as well as originals. |
High-quality results: Professionals ensure top-notch repair quality.
Genuine parts: Professionals often use OEM or high-quality parts. |
According to a survey by iFixit, 79% of people who attempted a DIY phone repair were successful. However, the remaining 21% encountered complications that required professional intervention.
7. Conclusion
Repairing your Samsung S10 screen can be challenging but rewarding. By following this guide and taking necessary precautions, you can save money and extend the life of your device. However, it’s crucial to assess your skills honestly, and feel free to seek professional help if you’re unsure at any point in the process.
Remember, while DIY repair can be a great solution, it’s not suitable for everyone or every situation. Always prioritize the safety and integrity of your device. With patience, the right tools, and careful attention to detail, you can breathe new life into your Samsung S10 with a successful screen repair.