
The black lines on the iPhone 11 screen are a display issue that significantly affects the user experience. The cause can be physical damage, software errors, or hardware defects. Users can try home remedies such as forced restart, LCD screen adjustment, charging cycle, iOS update, and factory reset. According to statistics, the cost of repairing an iPhone 11 screen with black lines usually ranges from 200 to 300 AUD, depending on the extent of damage and the service provider. If self-repair measures do not work, users should seek help from an Apple Authorized Service Provider or reputable third-party repair service. This article will provide detailed instructions on how to fix the problem, information on professional repair options, and when to seek professional help.
1. Why is a Black Line Appearing on the iPhone 11 Screen?
Based on the information provided, there are a few potential causes for the Black Line Issue on the iPhone 11:
- Physical Damage:
- Dropping the iPhone 11 or exposing it to liquid can potentially cause physical damage to the device’s display, leading to issues like the appearance of black lines.
- Physical damage to the display, such as cracks or scratches, can disrupt the normal functioning of the LCD panel and result in visual artifacts like black lines.
- Software Glitches:
- Issues following iOS updates can sometimes introduce software-related problems that manifest as visual glitches, including the appearance of black lines on the display.
- Compatibility problems or bugs in the software/firmware can occasionally cause display-related issues on the iPhone 11 after software updates.
- Hardware Defects:
- The “Black Line Issue” may also be caused by hardware-related problems, such as issues with the LCD panel or pixel damage.
- Defects in the manufacturing or assembly of the iPhone 11’s display components can lead to malfunctions and the appearance of black lines on the screen.
Is the black line a software or hardware issue?
If you notice a black line on the screen of an iPhone 11, this issue is typically due to hardware damage, though software glitches can sometimes be the culprit.
- Hardware Issues Leading to iPhone 11 Black Line on Screen
- The most common cause of a black line on iPhone 11 screen is physical damage. This may happen if your iPhone has been dropped, exposed to water, or impacted. In such cases, damage to the display components, such as the LCD or OLED panel, or a loose connection between the screen and the motherboard, can cause black lines to appear.
- Software Glitches Causing iPhone 11 Black Line on Screen
- Although less common, a black line on the screen of an iPhone 11 can sometimes be caused by software bugs. These glitches can often be resolved by updating iOS, restarting your device, or performing a factory reset.
Is it safe to use my iPhone if there is a black line on the screen?
If you’re dealing with an iPhone 11 black line on the screen, it’s generally safe to continue using the device, but there are some important factors to consider:
- Underlying Damage from iPhone 11 Black Line on Screen
The appearance of a black line on your iPhone 11 screen often points to underlying damage, such as a broken LCD or OLED panel, or possibly a loose connection inside the phone. While the line may not immediately affect your iPhone’s usability, ignoring the issue could result in more severe damage, eventually making the screen unusable.
- Potential for Screen Failure
Over time, the iPhone 11 black line on the screen could grow, and you may start experiencing additional problems, like flickering or total screen failure.
- Touch Screen Functionality
In some cases, the black line on the screen could cause the affected area to stop responding to touch, interfering with your ability to use certain functions of the phone.
- Heat and Battery Concerns
If the iPhone 11 black line on the screen is the result of internal damage (from a drop or water exposure), it could potentially lead to overheating or battery issues. Although this is uncommon, it’s something to watch for.
Can you fix the black line yourself, or need professional repair?
If you notice an iPhone 11 black line on screen, the cause may be either a software glitch or hardware damage. Here’s how to determine if you can fix it yourself or if you need professional help.
- Fixing iPhone 11 Black Line on Screen Yourself:
If the black line on your iPhone 11 screen is due to a software issue, you can try these simple fixes: Restart the iPhone to refresh the system; Update iOS to the latest version to resolve any potential software bugs or Perform a factory reset (after backing up your data) to eliminate software-related issues.
- When You Need Professional Repair:
If the black line on the screen is caused by hardware damage, such as a broken screen, loose connections, or internal display issues, you will need professional repair. Most cases of the iPhone 11 black line on the screen are hardware-related, and DIY repairs for hardware problems are not recommended as they may worsen the issue. 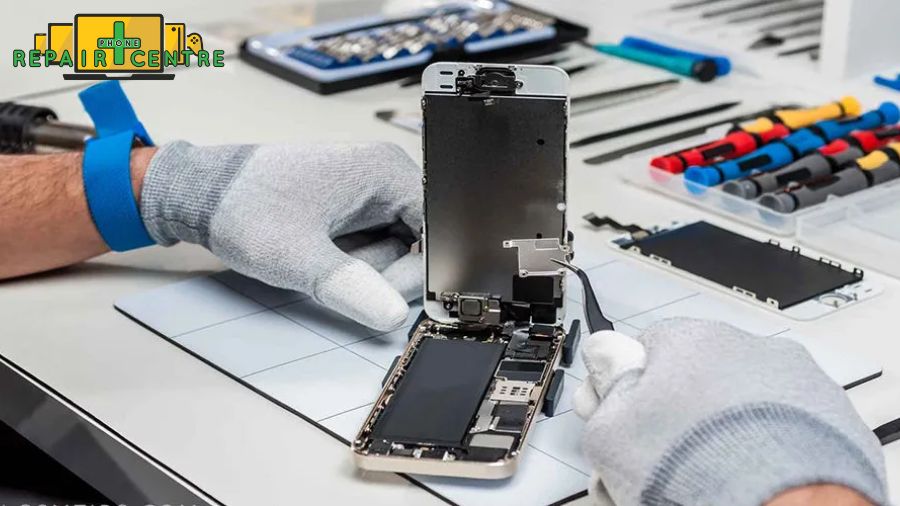
2. How to Fix the Black Line on My iPhone 11 Screen?
A black line on your iPhone 11 can be frustrating, but there are a few things you can try to fix before resorting to a technician. Here’s how to troubleshoot:
Software Fixes:
Force Restart iPhone for Screen Line Fix
A force restart is one of the quickest and simplest methods to try and fix the iPhone 11 black line on-screen issue. This method helps to clear minor software glitches that could be causing the display problem. Here’s how to do it:
- Press and quickly release the Volume Up button.
- Press and quickly release the Volume Down button.
- Press and hold the Side button (the Power button) until the Apple logo appears.
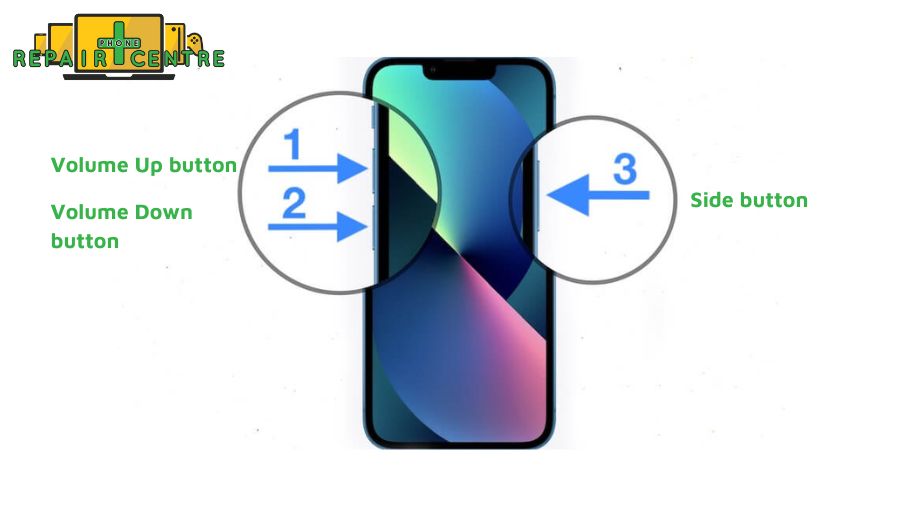
Once your iPhone restarts, check if the black line is gone. This method won’t affect your data, so trying without worrying about losing any information is safe. If the black line persists after a force restart, you may need to explore other software or hardware fixes.
Adjust the LCD Screen to Fix the Black Line
If you notice a black line on your iPhone 11 screen, adjusting the display settings might help resolve the issue, especially if it’s a software-related glitch. Follow these steps to adjust your screen settings:
- Go to Settings on your iPhone.
- Tap Display & Brightness.
- Adjust the Brightness slider to either lower or increase the brightness. Changing the brightness levels can sometimes help clear minor display issues like black lines.
- You can also toggle True Tone or Night Shift on and off to see if it makes a difference.
- Go to Settings > Accessibility > Display & Text Size and explore the Reduce Transparency and Increase Contrast options, which may alleviate the issue.
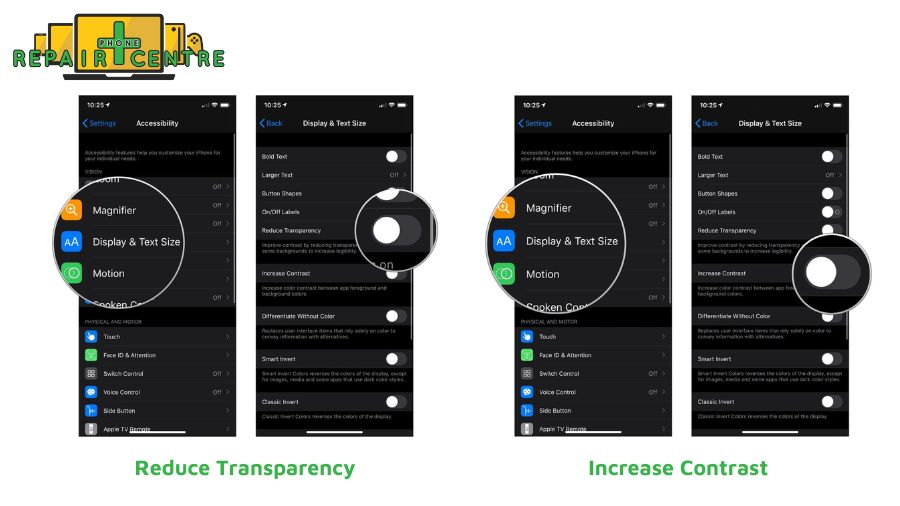 These settings can help recalibrate the display and potentially reduce or eliminate the black line. If the issue persists, it may be related to hardware damage, and further troubleshooting may be needed.
Perform a Cycle Charge to Resolve the Screen Issue
A cycle charge can sometimes help recalibrate your iPhone’s display and battery, potentially resolving issues like a black line on the iPhone 11 screen. Here’s how to perform a cycle charge:
- Drain the Battery Completely: Use your iPhone until the battery is fully drained, and the phone powers off on its own.
- Charge to 100% in One Go: Plug your iPhone into a charger and allow it to charge uninterrupted until it reaches 100%. Avoid using the phone during this charging process to ensure a proper cycle.
- Leave the Phone Charging for an Extra Hour: Even after it reaches 100%, leave it plugged in for about an additional hour to ensure full calibration.
- Restart Your iPhone: After the charge is complete, restart your iPhone by pressing and holding the Side button until the Apple logo appears.
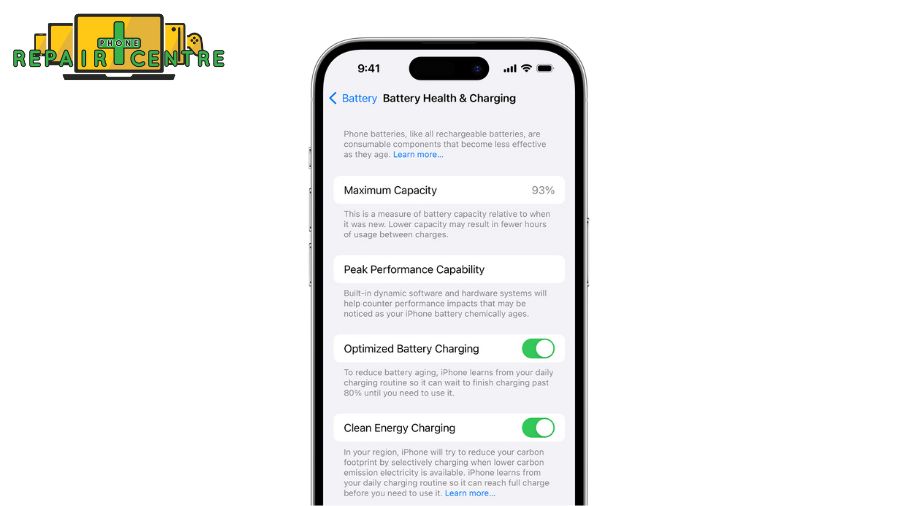
This method helps reset the battery calibration and might fix minor display issues like black lines. If the black line persists after the cycle charge, the issue is likely hardware-related and may require professional repair.
Use Professional Tool to Fix iPhone 11 Black Line on Screen [Fastest & Easiest]
If basic troubleshooting steps don’t eliminate the frustrating black line on your iPhone 11 display, using a professional iOS repair tool is your best bet for safely resolving the problem. UltFone iOS System Repair is recognized for its speed and simplicity in resolving screen glitches, such as persistent black bars, and addressing over 150 other common iOS system issues. Watch the video guide to see how to fix the iPhone 11 black line on screen using UltFone iOS System Repair.
Enter DFU Mode to Fix iPhone 11 Screen Issues
The Device Firmware Upgrade (DFU) mode is an alternative low-level state that reloads all system components without fully turning on the device. Attempting a DFU mode restore can reset software-related issues such as black lines on the screen. Here’s how to fix a growing black line on an iPhone screen:
- Connect your iPhone to a computer via a USB cable and open iTunes or Finder.
- Then, press and quickly release the Volume Up button, followed by pressing and quickly releasing the Volume Down button.
- Hold the Power button for 10 seconds.
- Release the Power button but hold the Volume Down button for 5 more seconds.
- If successful, your iPhone will enter DFU mode and be ready for an emergency restore.
You can watch the video below for a clearer understanding.
Restore iPhone Using iTunes for Screen Line Fix
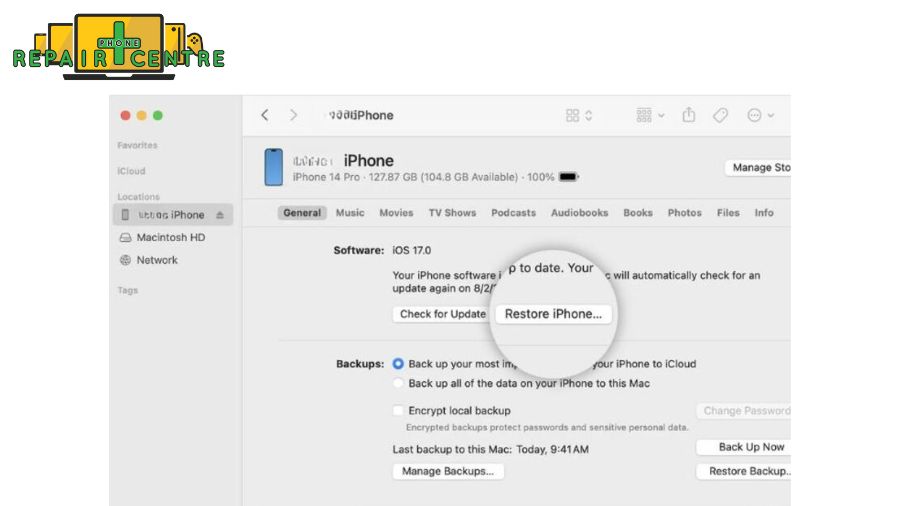
As a final option, you can wipe and fully restore your iPhone’s system software using iTunes or Finder. This process will erase all contents and settings, reinstalling a clean iOS build. Here are the steps:
- Connect your iPhone to a computer running iTunes or Finder.
- Next, click on “Restore” on the summary page to begin the restoration process. Follow the on-screen prompts to confirm the erasure and wait for the restoration to finish.
- Once completed, set up your iPhone again and verify if the black lines on the screen have been resolved.
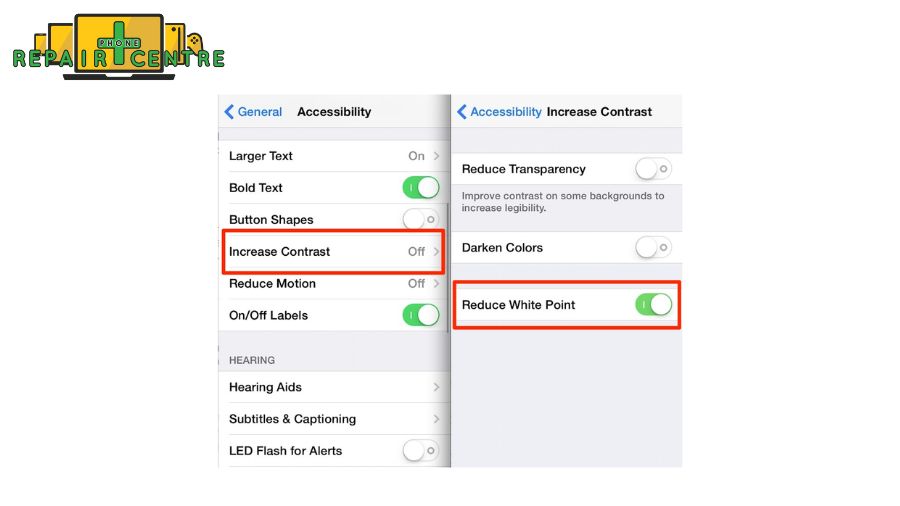
Reduce White Point in Settings to Fix Screen Issues
Adjusting the white point can help minimize the visibility of black lines on an iPhone 11 display. Here’s how:
- Open Settings and go to Accessibility.
- Scroll down and tap on Display & Text Size to adjust the settings according to your preferences.
- Toggle off the white point setting.
Update iOS Software to Fix Screen Problems
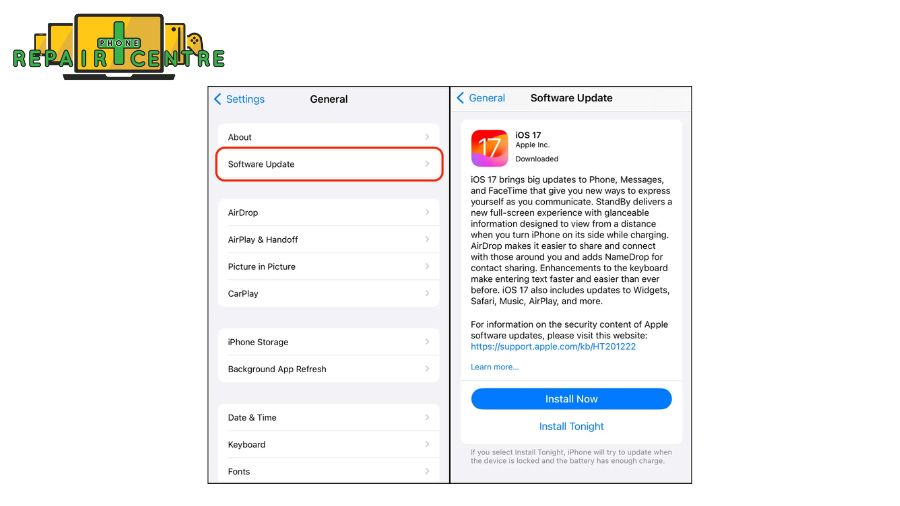
Because the black line may stem from an iOS software glitch, updating to the latest iOS version could potentially resolve display issues. Here’s how you can update your iPhone to the latest iOS version:
- Open Settings and go to General > Software Update.
- Tap on the most recent iOS update available.
- Tap Download and Install.
- Follow the prompts to finish installing the latest iOS version.
- Check the display to see if the black line issue persists after the update.
Factory Reset iPhone to Remove Screen Line [Data Loss Possible]
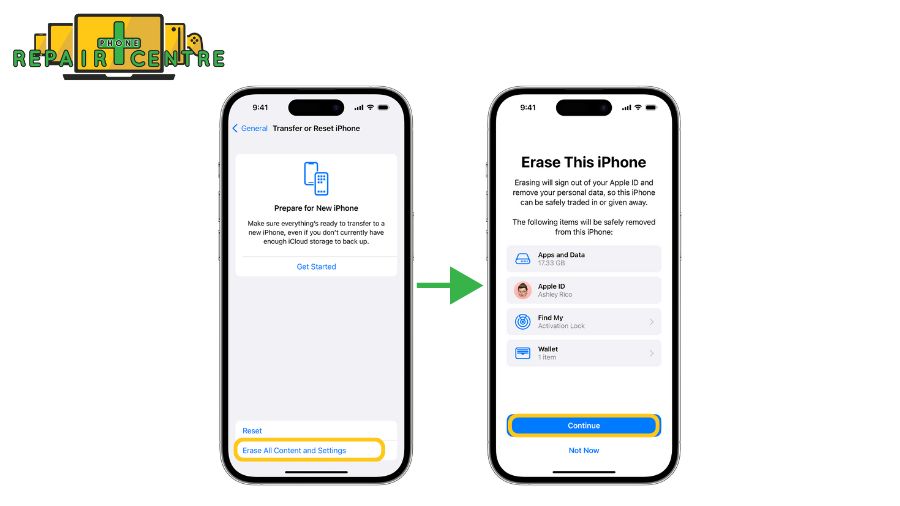
If all other methods fail, you can perform a complete factory reset on your iPhone to eliminate any software-related issues causing black lines. This process will delete all data on your device. Here’s how to do it:
- First, back up your iPhone data to preserve it.
- Go to Settings > General > Reset.
- Tap “Erase All Content and Settings“.
- Follow the prompts to confirm and initiate the factory reset.
- After the reset is complete, test the display to check if the black lines issue has been resolved.
Will a factory reset fix the black line on my screen?
A factory reset may fix the iPhone 11 black line on the screen if the issue is due to a software glitch. A factory reset can resolve software-related problems that might be affecting the display by restoring your iPhone to its original settings and wiping all data. However, a factory reset will not fix the issue if the black line on your iPhone 11 screen is caused by hardware damage, such as a broken LCD or OLED display or a loose connection inside the device. In this case, you will need professional repair or a screen replacement to resolve the problem.
Key Points:
- Factory reset can fix software-related issues: If the iPhone 11 black line on screen is caused by a software malfunction, a factory reset may help resolve the issue.
- Factory reset won’t fix hardware problems: If the black line is due to physical damage, such as a damaged display, a factory reset won’t solve the problem. Professional repair is required.
Always back up your data before performing a factory reset, as it will erase everything on your device. Hardware Fixes:
Adjust LCD hardware to fix the black line
Warning: Adjusting the LCD hardware on your iPhone 11 is a delicate task that may void your warranty or cause further damage if not done correctly. If you’re not experienced with phone repairs, it’s recommended to seek professional help. However, if you’re comfortable with the process, here’s a step-by-step guide to adjust the hardware and possibly fix the iPhone 11 black line on screen.
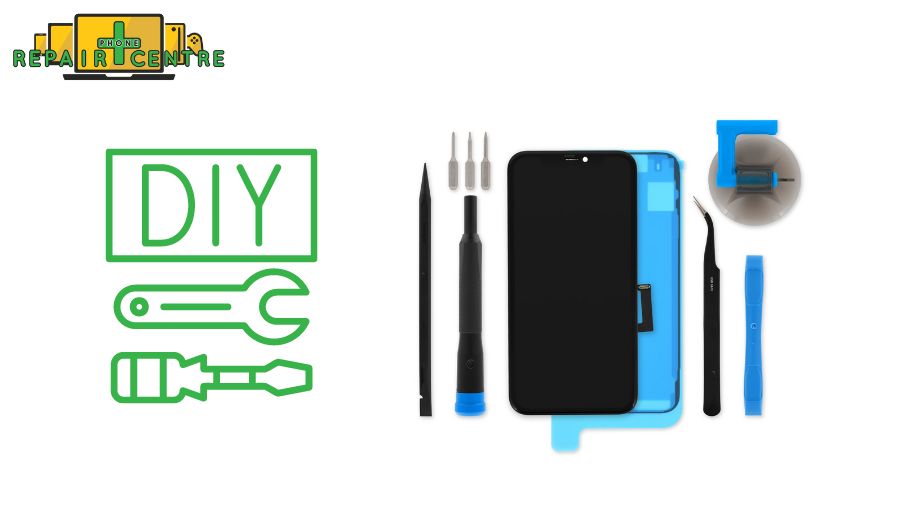
Tools Needed:
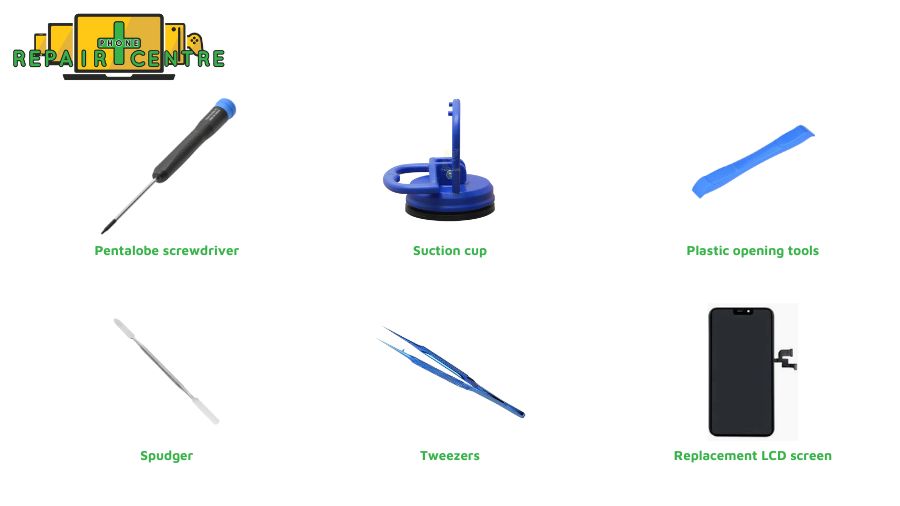
- Pentalobe screwdriver
- Suction cup
- Plastic opening tools
- Spudger
- Tweezers
- Replacement LCD screen (if needed)
Step-by-Step Instructions:
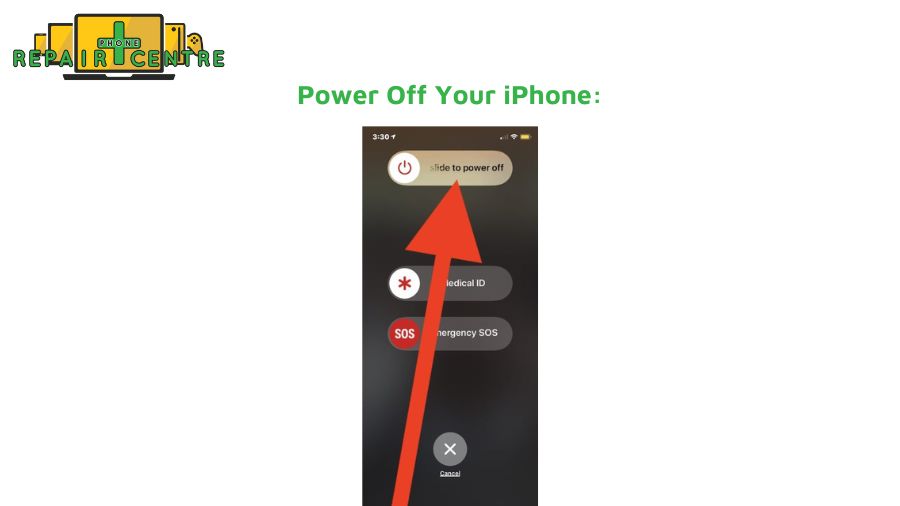
- Power Off Your iPhone: Before starting the repair, ensure your iPhone 11 is completely powered off to prevent any damage or electric shock.

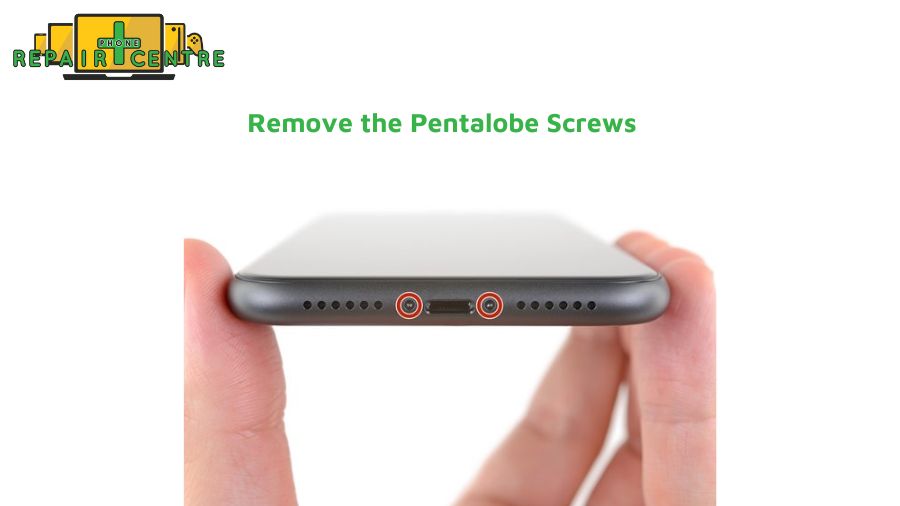
- Remove the Pentalobe Screws: Use a pentalobe screwdriver to remove the two screws located at the bottom of the iPhone near the charging port. These screws secure the display to the body of the phone.
- Use a Suction Cup to Lift the Screen: Attach a suction cup to the lower half of the iPhone screen. Pull upward to create a small gap between the screen and the phone’s body. Carefully use a plastic opening tool or spudger to work around the edges, separating the screen from the chassis. Take your time to avoid damaging the screen.

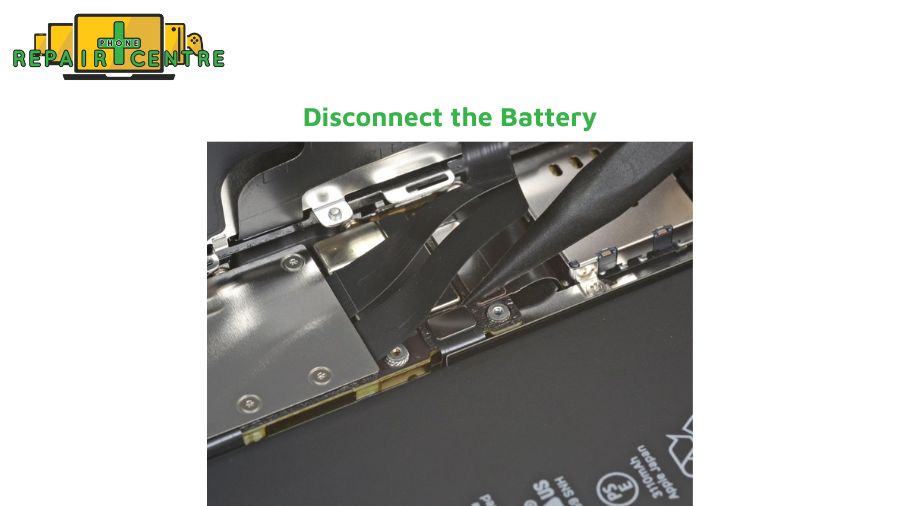
- Disconnect the Battery: With the screen lifted, you must disconnect the battery to prevent any electrical issues during the repair. Use the spudger to disconnect the battery connector carefully.
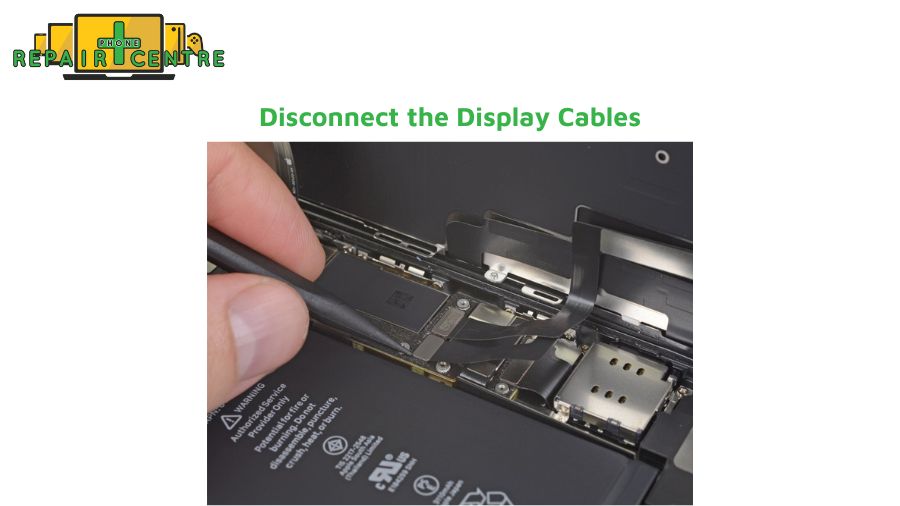
- Disconnect the Display Cables: Locate the display connectors on the motherboard that attach the LCD screen to the internal components. Use your spudger or tweezers to disconnect these cables carefully. Be sure to note how they are connected for reassembly.
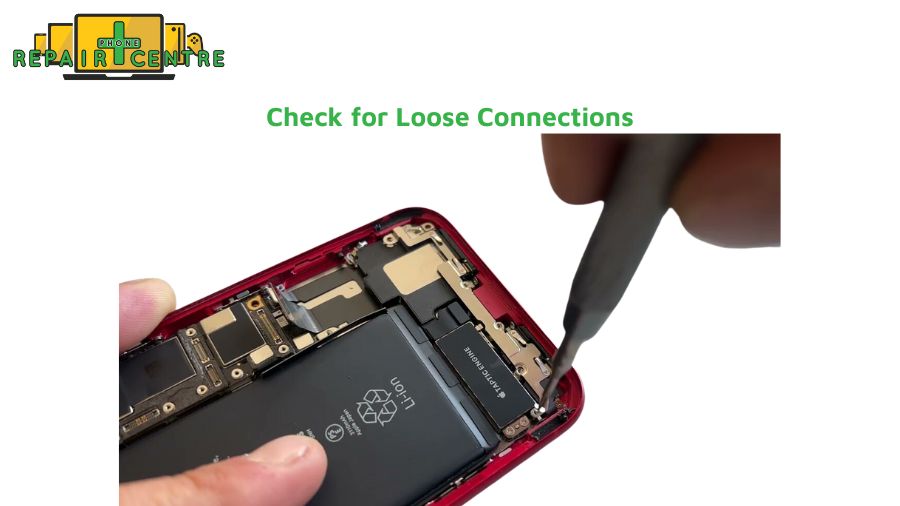
- Check for Loose Connections: Inspect the LCD connectors to ensure they are properly seated. If any connectors are loose or damaged, carefully reconnect or replace them as needed. Loose connections can cause the iPhone 11 black line-on-screen issue.
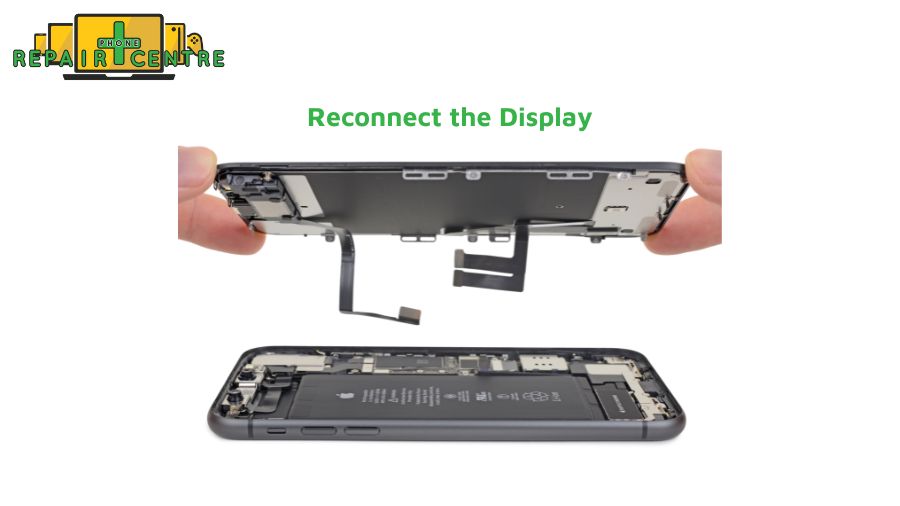
- Reconnect the Display: If adjusting the hardware without replacing the screen, carefully reconnect the LCD and touchscreen connectors to the motherboard.
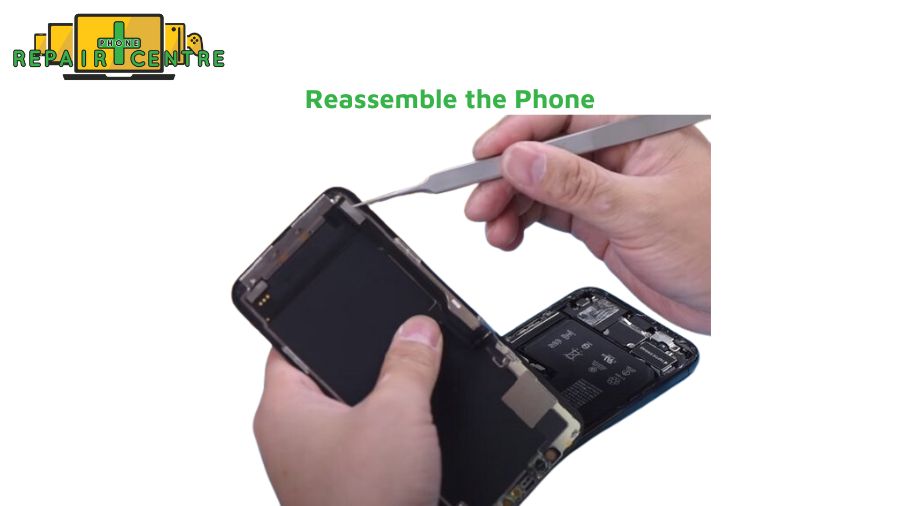
- Reassemble the Phone: After adjusting or replacing the LCD hardware, reconnect the battery. Gently press the display back into place, making sure all clips align correctly. Secure the screen by screwing the pentalobe screws back into the bottom of the phone.
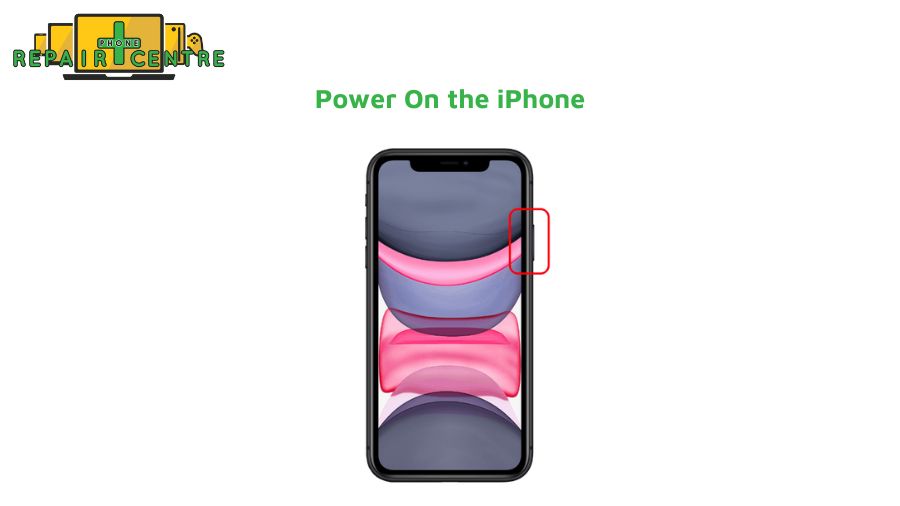
- Power On the iPhone: Turn your iPhone 11 back on and check if the black line on the screen has been resolved. If the black line persists, the issue may require a full screen replacement.
Important Tips:
- Be cautious when handling the display cables as they are delicate and can easily be damaged.
- Use the appropriate tools to prevent scratching or harming internal components.
- If the iPhone 11 black line on the screen remains after adjusting the hardware, the screen itself may need to be replaced.
When do you need to replace the screen or hardware components?
If you’re noticing a black line on your iPhone 11 screen, it could be a minor issue or a more serious hardware problem. Here’s how to determine when it’s time to replace the screen or other hardware components: 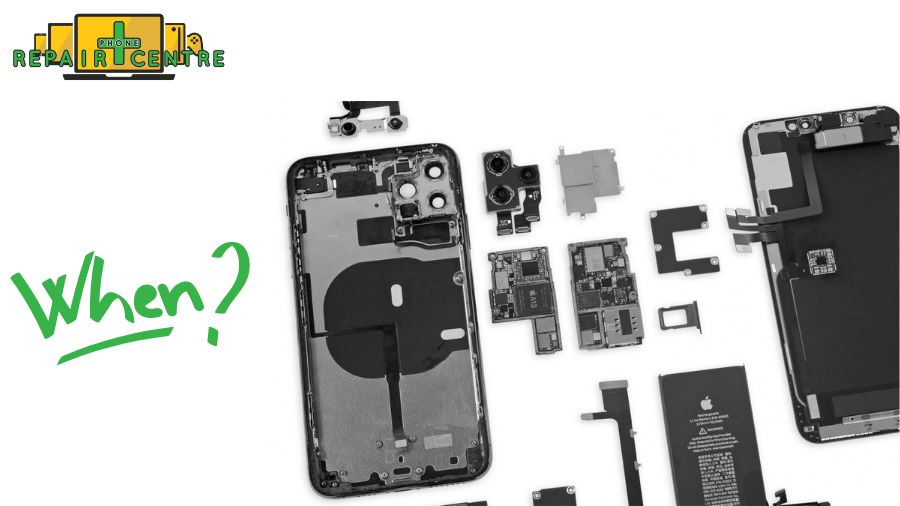
- Persistent Black Line After Software Fixes
If the iPhone 11 black line on screen persists after attempting software fixes like restarting, updating iOS, or performing a factory reset, it’s likely a hardware issue. When software solutions fail, a hardware replacement may be necessary to fix the black line.
- Screen Cracks or Physical Damage
Visible cracks, chips, or deep scratches can damage the LCD or OLED panel beneath the screen. If you dropped your phone and noticed the black line on the iPhone 11 screen, it may indicate that the screen has been damaged. In such cases, you’ll need a screen replacement to fix the issue. No software fixes can repair damaged LCD or OLED panels.
- Touch Screen Malfunctions
If the black line on your iPhone 11 screen is accompanied by touchscreen problems—like unresponsiveness or areas that no longer detect touch—this is a clear sign of display damage. Replacing the screen can resolve both the black line and touch issues.
- Water or Liquid Damage
Exposure to water or other liquids can damage internal components, including the screen. If you see a black line on the iPhone 11 screen after liquid exposure, both the display and possibly other components, like the logic board, may require replacement.
- LCD or OLED Panel Failure
A black line on the iPhone 11 screen can also indicate that the LCD or OLED panel is failing. Over time, panels can degrade or become damaged due to impact. If the display shows signs like flickering, dead pixels, or colored lines, the panel likely needs replacing.
- Loose or Damaged Display Cables
Sometimes the black line on the iPhone 11 screen is caused by loose or damaged connectors between the display and the motherboard. If reseating the cables doesn’t fix the issue, the connectors or the entire display assembly may need replacement.
- Widespread Display Issues
If the black line on your iPhone 11 screen starts expanding or is accompanied by other display issues like ghost touches, flickering, or color distortions, this points to significant hardware failure. In these cases, replacing the screen or other hardware components is the best solution.
3. How much does it cost to fix a black line on the iPhone 11 screen?
The cost to fix a black line on an iPhone 11 screen depends on the severity of the issue and whether it requires a full-screen replacement or just a repair of internal components like connectors. Here’s a general breakdown:
- Apple Store or Authorized Service Provider:
- Screen Replacement: If the black line is due to a damaged LCD or OLED display, a full screen replacement is required. At an Apple Store or authorized service provider, this typically costs between $199 and $329 (depending on your location and whether you have AppleCare+).
- With AppleCare+: If you have AppleCare+, the cost is significantly reduced, typically around $29 for screen repairs.

- Third-Party Repair Shops:
- Prices at third-party repair shops can vary but are usually lower than Apple’s rates, ranging from $120 to $375 for a screen replacement (Phone Repair Centre) depending on your screen replacement option.

- DIY Repair Kits:
- If you’re confident with phone repairs, you can purchase a DIY screen replacement kit, which costs between $50 to $100. However, this comes with the risk of causing further damage if not done properly, and it will void any existing warranty.
 Factors Affecting the Cost:
- Extent of Damage: If the black line is due to internal issues like loose display connectors or logic board damage, the cost may increase as more components may need repair or replacement.
- Warranty Status: If your iPhone 11 is still under warranty or covered by AppleCare+, you can save significantly on repair costs.
4. Does Apple Warranty Cover the Black Line Issue?
The Apple warranty typically does not cover issues like a black line on the screen if it’s caused by accidental damage, such as drops or impacts. However, if the black line is due to a manufacturing defect and your device is still within the warranty period, it may be covered. For accidental damage, AppleCare+ can provide coverage, but a fee will apply for screen repairs.