If your iPhone XR screen is cracked, unresponsive to touch, or not displaying properly, you can restore it by replacing the screen with a new display assembly. Ensure the replacement screen includes a frame and a metal LCD shield. Transfer the earpiece speaker + sensor assembly from your old display to the new one carefully, as it’s paired with your iPhone for Face ID. Damaging these components will disable Face ID, which only Apple can restore. True Tone functionality is disabled after any screen replacement, even with an original Apple screen.
1. Tools and Materials Needed
- iPhone XR Screen
- P2 Pentalobe Screwdriver iPhone
- Tri‑point Y000 Screwdriver
- Phillips PH000 Screwdriver
- Opening picks
- Suction handle
- Heat gun
- Spudger
- Tweezers

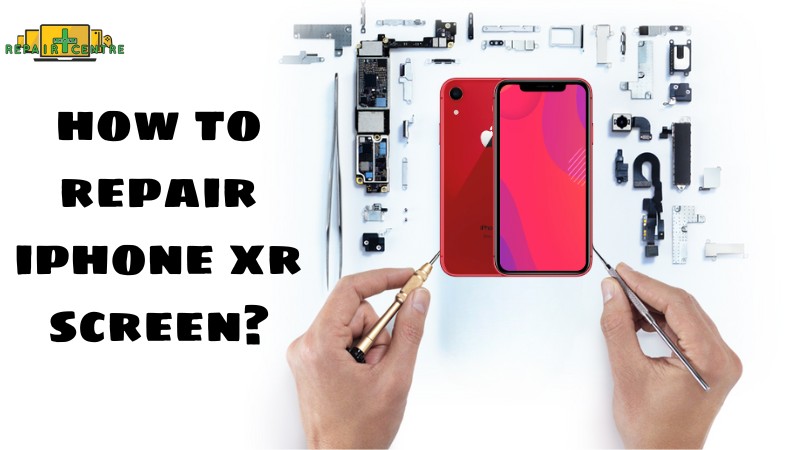
2. Step-by-Step Guide to Repairing Your iPhone XR Screen
Repairing an iPhone XR screen requires both precision and attention to detail. To help you get started, we’ve created a step-by-step guide that walks you through the entire repair process. Before you dive in, take a moment to watch this quick video, which will give you a visual overview of the key steps involved and important points to keep in mind. Once you’ve finished watching, scroll down to find the detailed instructions, complete with helpful tips to guide you through each step and ensure a successful repair.
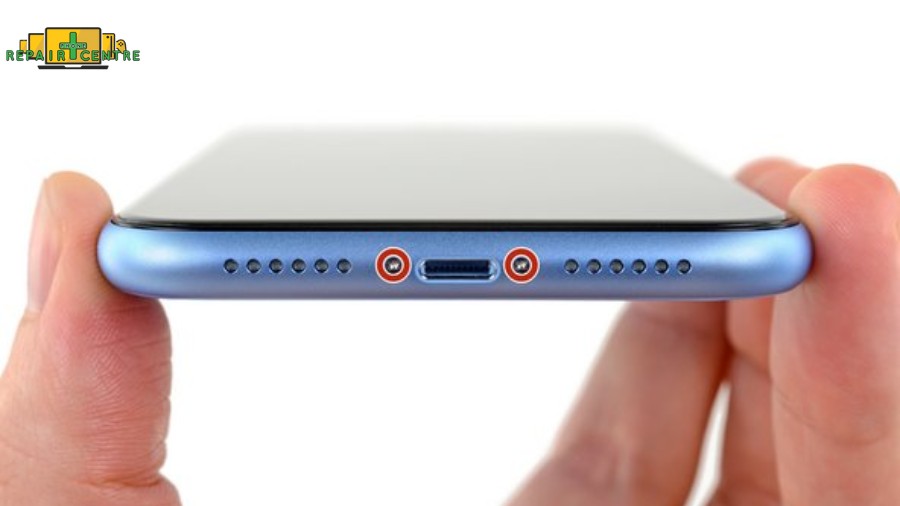
Step 1: Remove the pentalobe screws
Turn off your iPhone and unscrew the two 6.7 mm pentalobe screws located at the bottom edge. Prepare replacement waterproof seals if necessary.
Step 2: Mark your opening picks
Mark your opening picks 3 mm from the tip to prevent damage. Alternatively, tape a coin to a pick for marking.

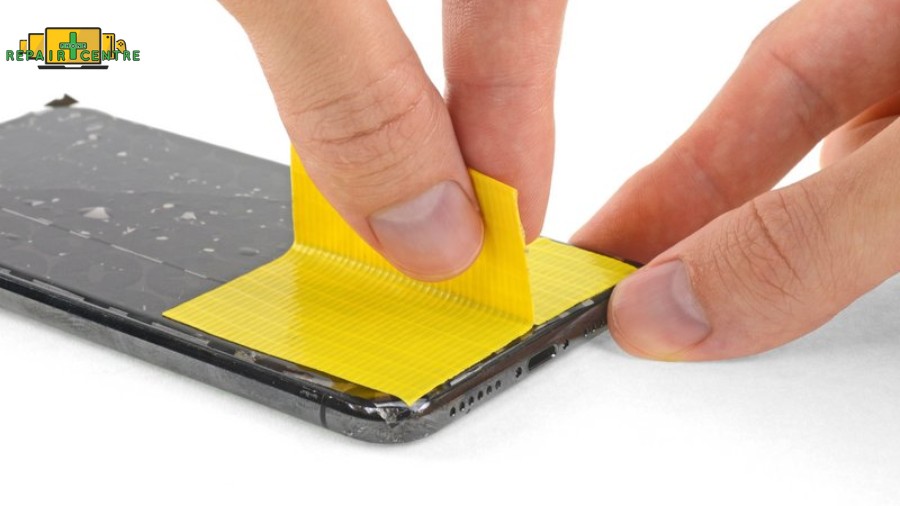
Step 3: Cover any cracks with tape
If the screen is cracked, cover it with packing tape to prevent further damage. Wear safety glasses during this step.
Step 4: Gently heat the screen
Heat the lower edge of the iPhone with a hairdryer or heat gun for about a minute to soften the adhesive. Carefully insert an opening pick.
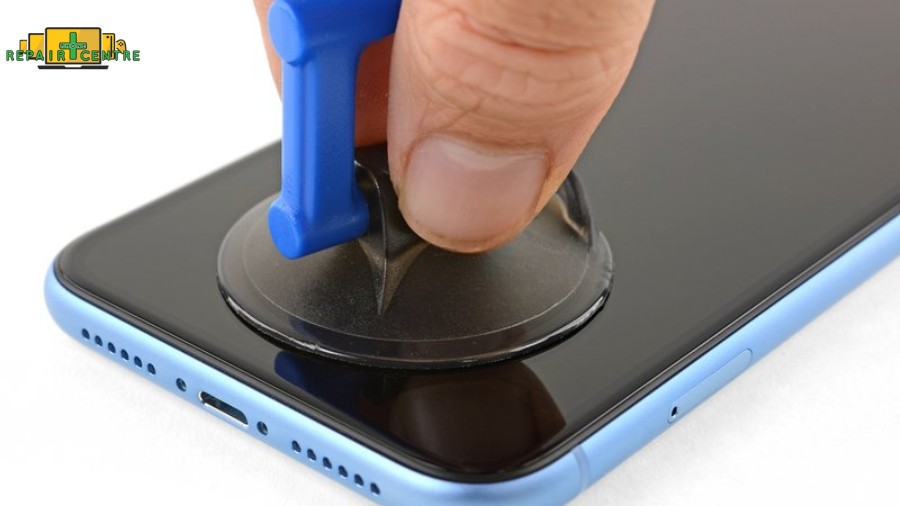
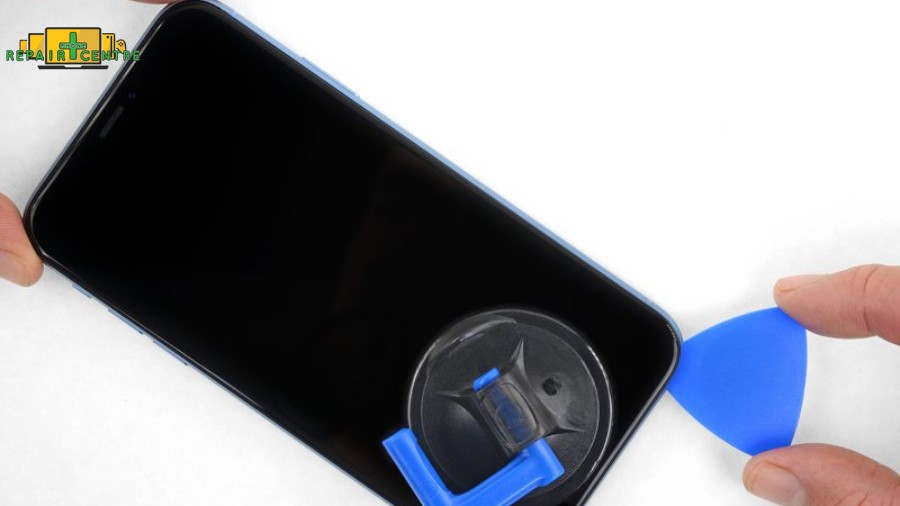
Step 5: Use a Suction Cup to lift the Screen
If using a single suction handle, apply it to the phone’s bottom edge, avoiding the curved glass portion.
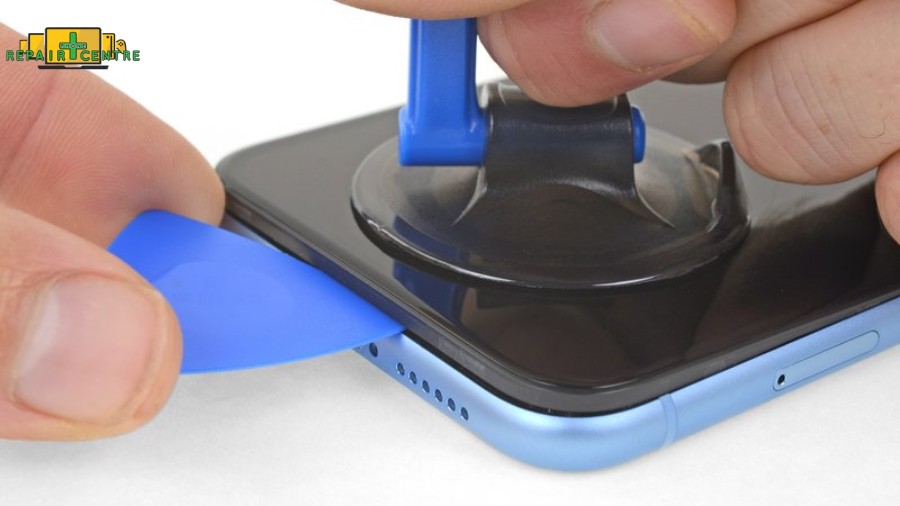
Step 6: Loosen the screen adhesive
Pull up on the suction cup with firm, constant pressure to create a small gap between the front panel and rear case. To separate them, insert an opening pick under the plastic bezel, not the screen.
Slide an opening pick around the lower left corner and up the left edge of the iPhone to cut through the adhesive. To avoid damaging internal components, do not insert the pick more than 3 mm.
Step 7: Screen information
Step 8: Glide the tool along the upper corner of the display
Glide the tool along the upper corner of the display, gently nudging or shifting it towards the Lightning port. Don’t break the clips; work patiently and avoid inserting the pick more than 3 mm.
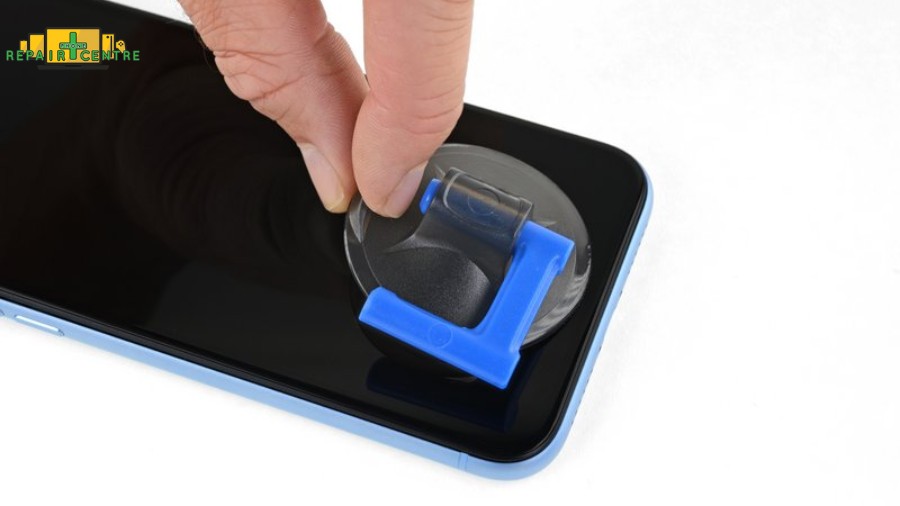
Step 9: Detach nub from the front panel
Pull on the small nub of the suction cup to detach it from the front panel.
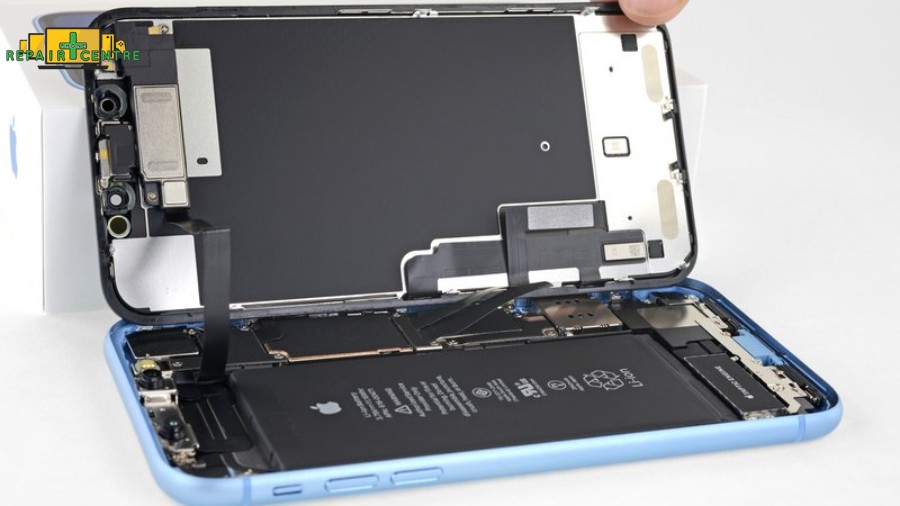
Step 10: Swing the display up from the left side
Swing the display from the left side like opening a book cover. Keep the display propped against something to prevent stressing the fragile ribbon cables connecting it to the logic board.
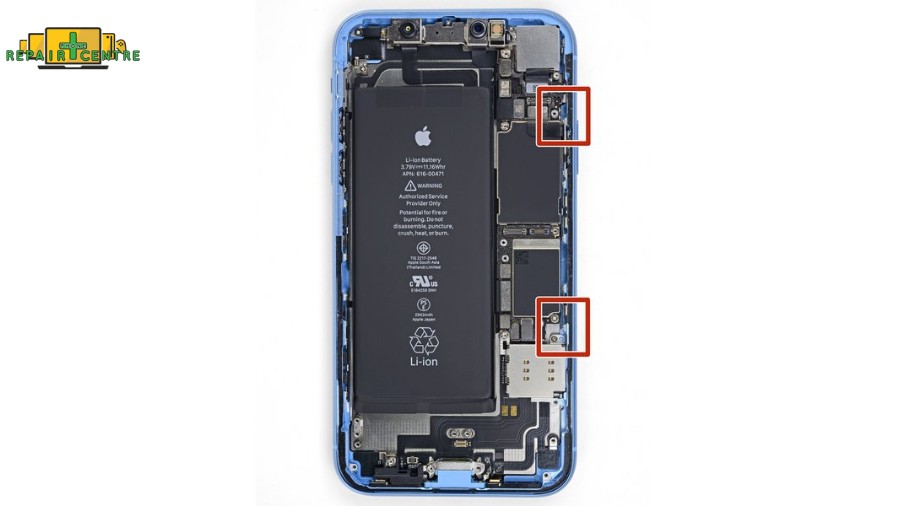
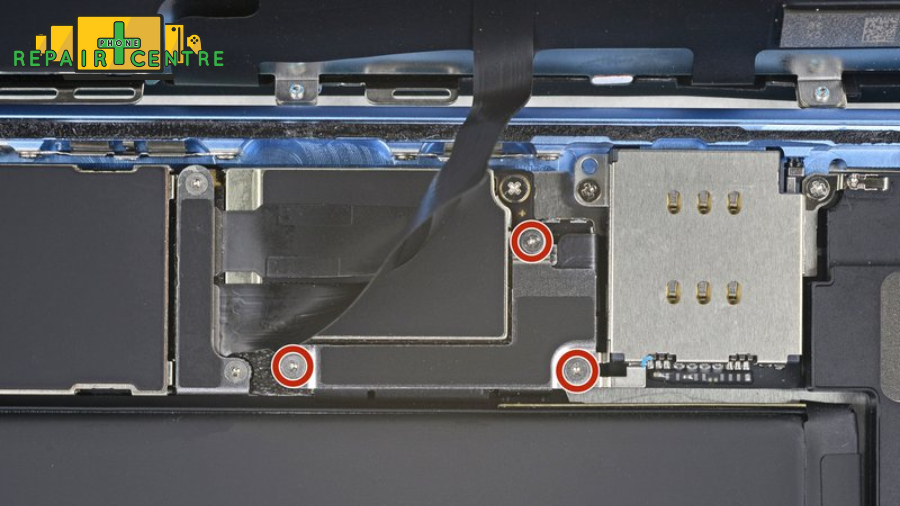
Step 11: Remove the screws securing the battery connector cover
Remove three 1.2 mm Y000 screws securing the battery connector cover bracket. Keep track of screws and bracket placement to avoid damage.
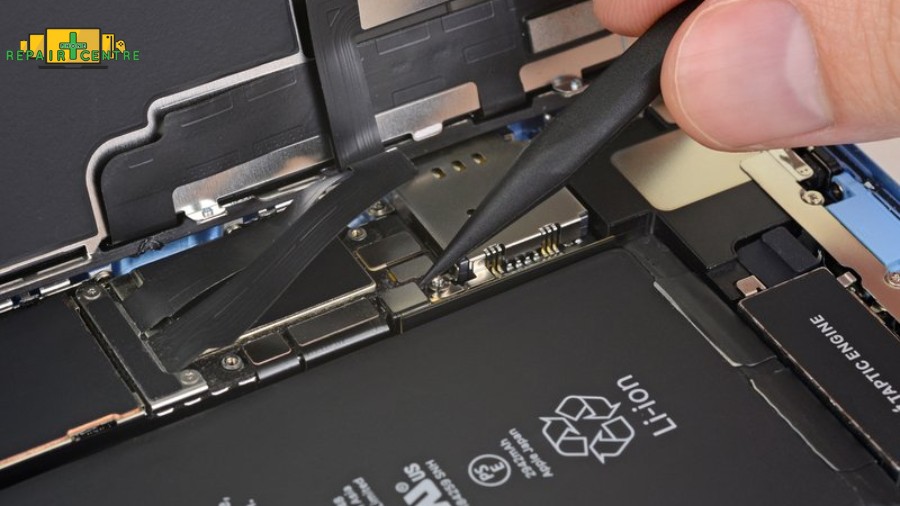
Step 12: Detach the battery connector
Use a spudger to pry up the battery connector straight out of its socket. Bend the connector away from the logic board to prevent accidental power during repair.
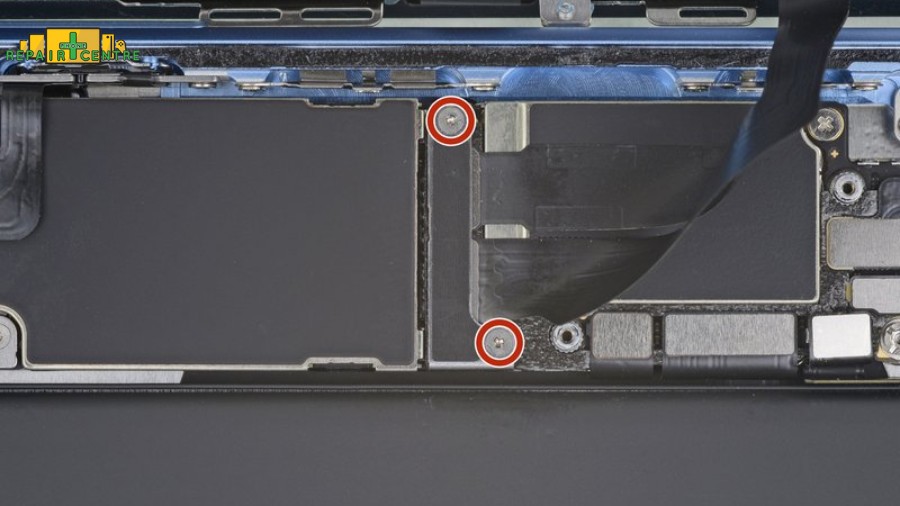
Step 13: Remove the screws securing the display connector cover
Remove two 1.2 mm Y000 screws securing the display connector bracket. Be mindful not to lose screws or misplace the bracket.
Step 14: Detach the digitizer connector
Pry up and disconnect the digitizer cable using a spudger. Reconnect carefully during reassembly to avoid damage.
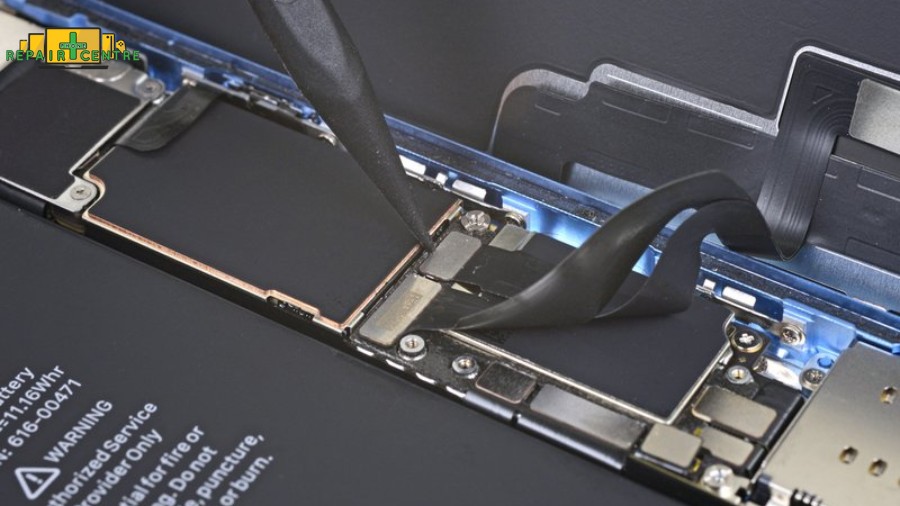
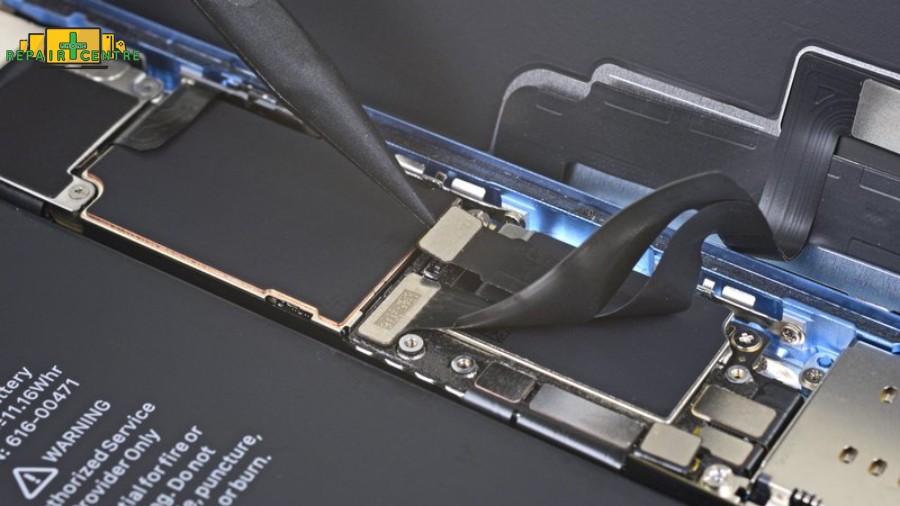
Step 15: Detach the display connector
Use a spudger to disconnect the display cable connector cautiously, ensuring the cable remains undamaged.
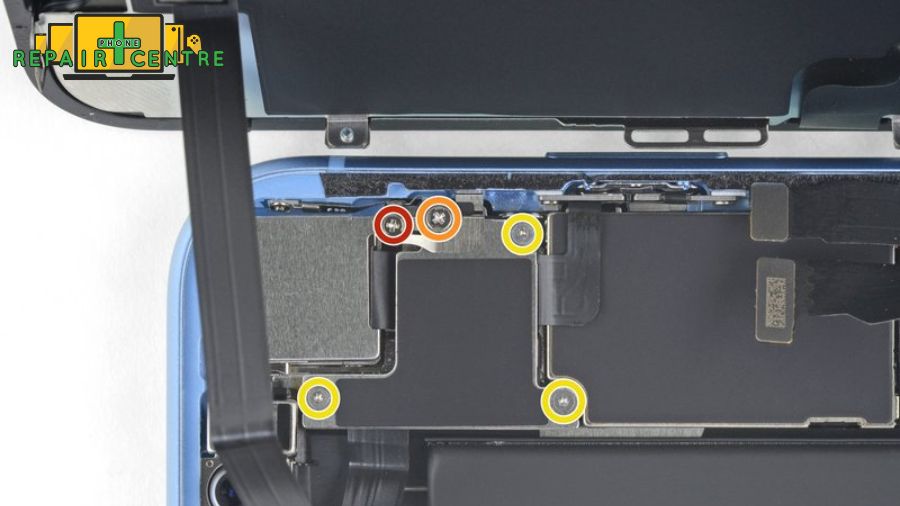
Step 16: Remove the screws securing the logic board connector cover
Remove five screws securing the logic board connector bracket: one 1.3 mm Phillips #000, one 1.5 mm Phillips #000, and three 1.2 mm Y000 screws. Take note of the smaller attached brackets.
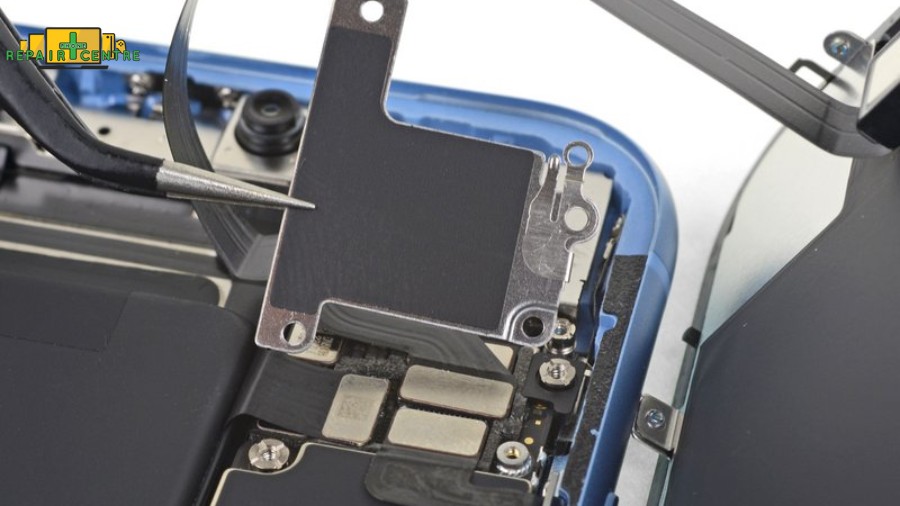
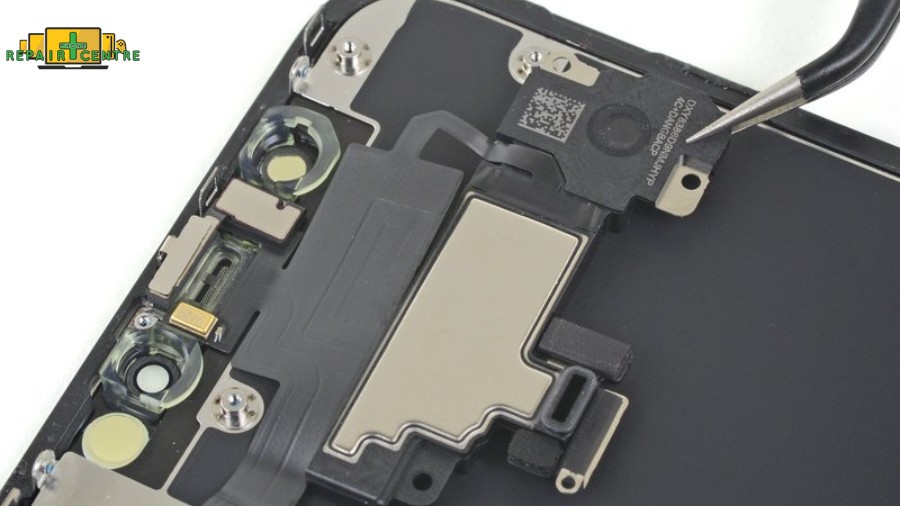
Step 17: Disconnect the front sensor connectors
Pry up the front sensor assembly connector using a spudger. Be gentle to avoid damage.
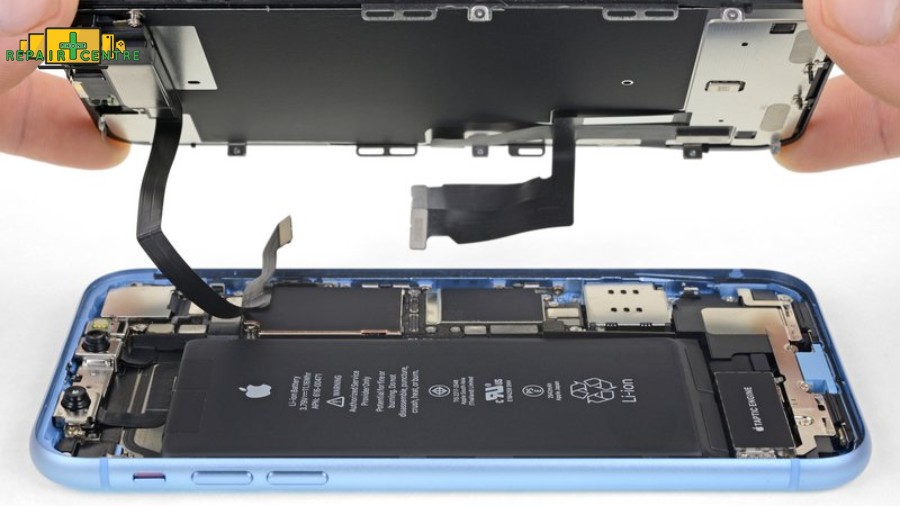
Step 18: Remove the display assembly from the device
Carefully lift and remove the display assembly from the iPhone. Consider replacing waterproof adhesive during reassembly.
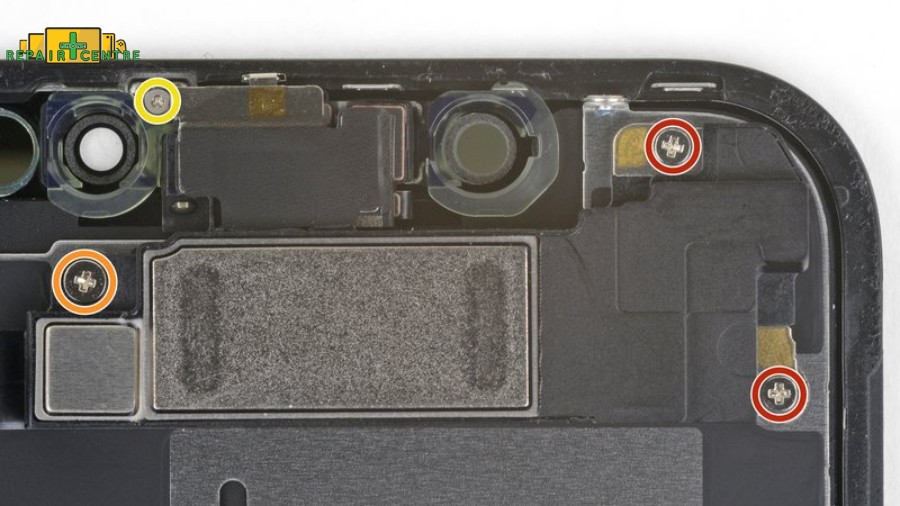
Step 19: Remove the screws securing the earpiece speaker
Remove four screws securing the earpiece/sensor assembly to the back of the display. Use appropriate tools to avoid damage.
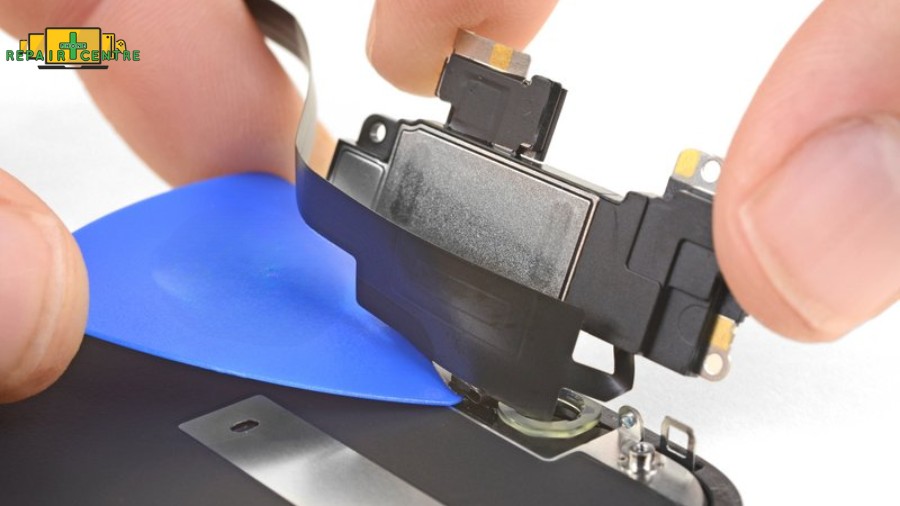
Step 20: Rotate the speaker over
Carefully use tweezers to pivot the earpiece speaker assembly away from the top edge of the display. Avoid straining the attached flex cable.
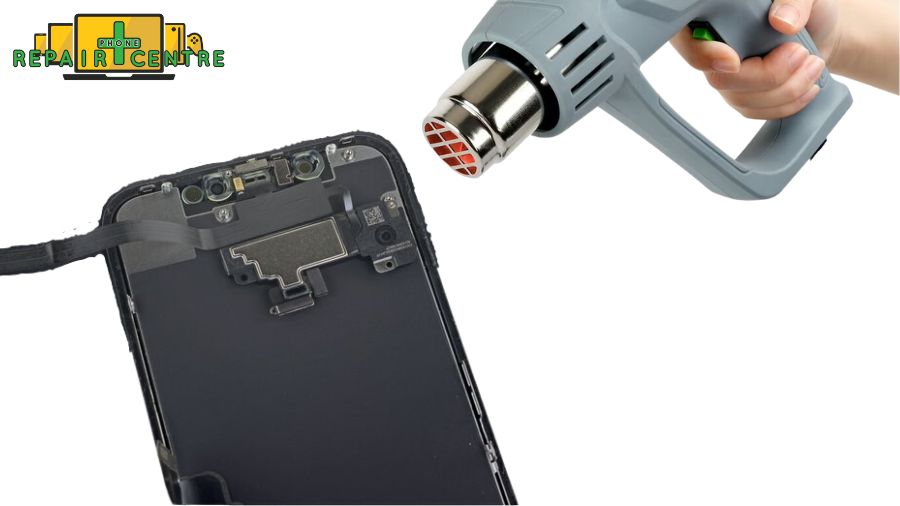
Step 21: Gently heat the front sensor strip
Apply heat to the top front of the display for about a minute to soften adhesive securing the sensors.
Step 22: Gently lift the microphone
Use a spudger to delicately pry and detach the microphone from its position in the front panel. Apply heat if necessary.
Step 23: Gently lift the proximity sensor
Slide an opening pick under the proximity sensor + flood illuminator module, gently lifting and wiggling to separate it from the front panel.
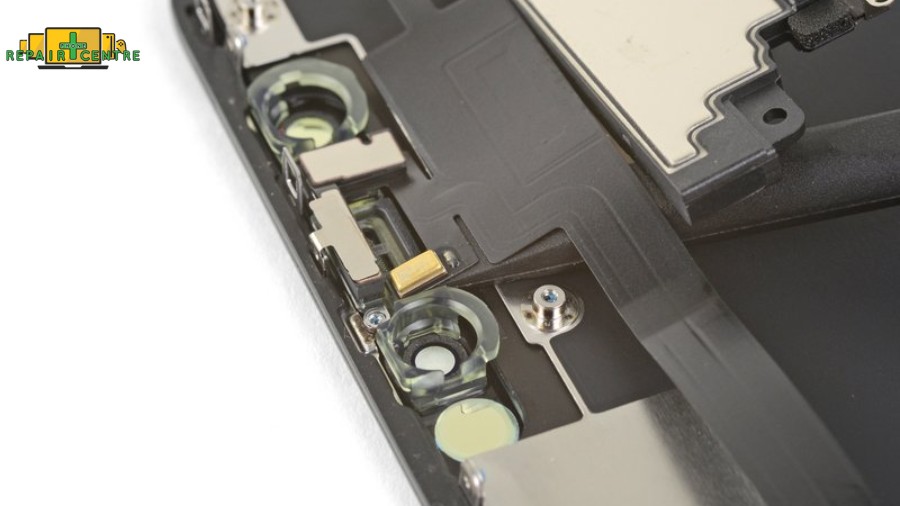
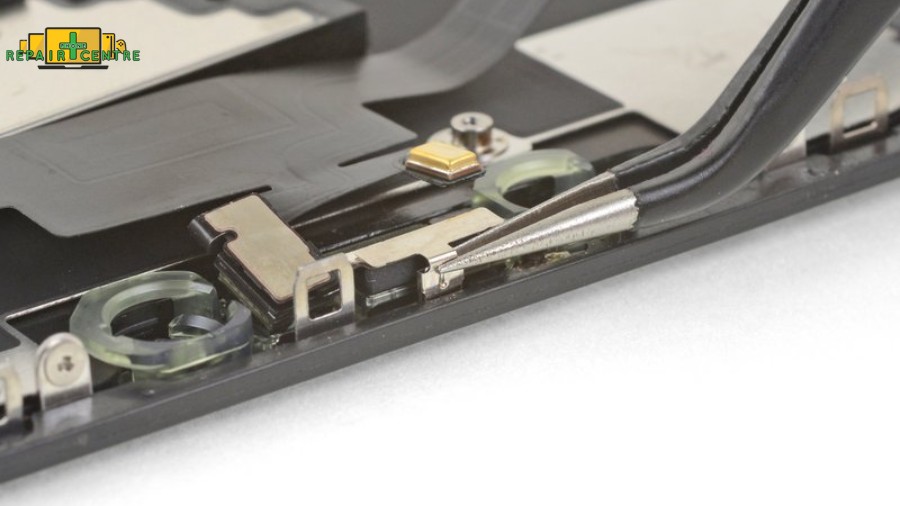
Step 24: Remove the bracket securing the ambient light sensor
Use tweezers to remove the small bracket off the ambient light sensor
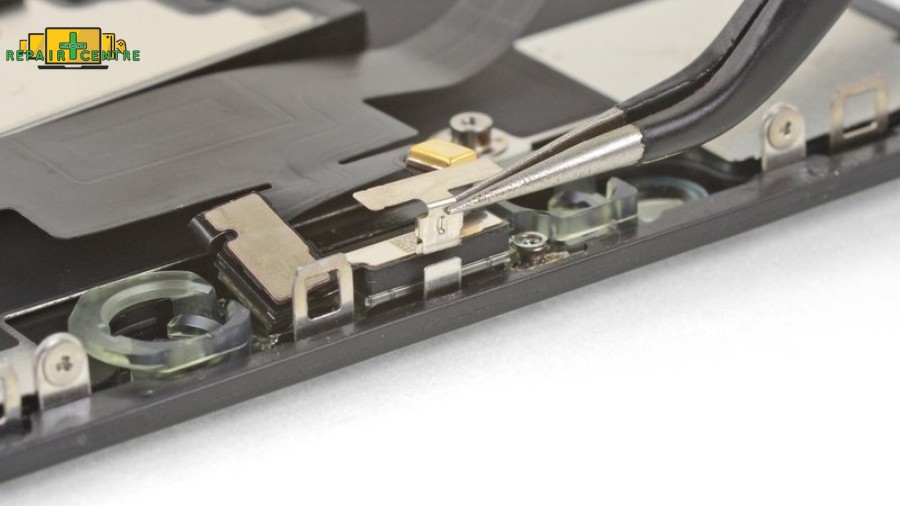
Step 25: Gently lift the ambient light sensor
Use tweezers to wiggle and lift the ambient light sensor from its notch in the display. Apply heat if needed.
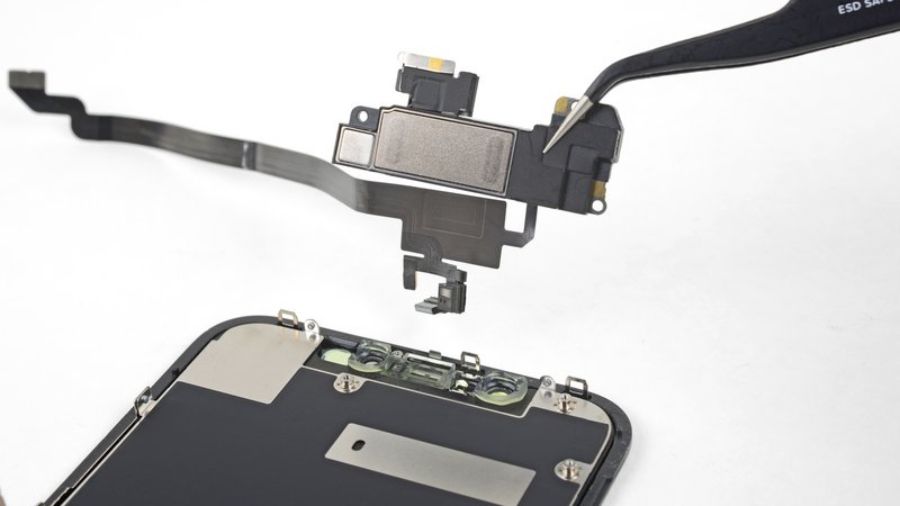
Step 26: Remove the speaker and front sensor assembly
Carefully remove the earpiece speaker and front sensor assembly, ensuring proper positioning for components during reassembly.
3. FAQs
How long does it take to replace an iPhone XR display?
Replacing the iPhone XR display typically takes 30 to 60 minutes. If you’re new to DIY phone repairs, take your time and follow each step closely to avoid damaging sensitive components like the display connectors or internal circuits.
Will replacing the iPhone XR display affect Face ID functionality?
Yes, if you don’t transfer the Face ID module correctly, it can cause Face ID to stop working. This module includes the front camera and sensors, so it’s crucial to handle them with care to ensure Face ID works after the screen replacement.
Can I still use my iPhone XR if I don’t reseal the display with adhesive?
While your iPhone XR may function without adhesive, resealing the display is strongly recommended. This keeps the phone water and dust resistant, protecting the internal components from long-term damage.
Will replacing the iPhone XR screen myself void the warranty?
Yes, performing a DIY iPhone XR screen replacement will void any existing warranty or AppleCare protection. Only repairs conducted by Apple or authorized repair centers maintain warranty coverage.
What should I do if the new iPhone XR display is not responding to touch?
If the touchscreen doesn’t respond after installing the new display, try these steps:
- Ensure the display connectors are firmly seated.
- Check for any internal component damage during installation.
- Restart the phone to reset software settings. If the issue persists, the replacement screen might be defective, or the problem could be with the logic board.