Replacing the display can be a budget-friendly solution if your iPhone 12 screen is cracked, unresponsive, or malfunctioning. In this comprehensive DIY guide, we’ll show you how to gradually replace the iPhone 12 display, allowing you to fix your phone at home and avoid costly repair services.
Whether you’re an experienced tech enthusiast or a beginner wanting to repair your device, this guide covers all the essential tools, tips, and precautions to ensure a smooth and successful iPhone 12 screen replacement. Follow along and get your iPhone 12 back to full working condition today!
1. Required Tools and Materials
- iPhone 12 Screen
- P2 Pentalobe Screwdriver iPhone
- Tri‑point Y000 Screwdriver
- Phillips PH000 Screwdriver
- Opening picks
- Suction handle
- Heat gun
- Spudger
- Tweezers

2. Step-by-Step Guide to Repairing Your iPhone 12 Screen
Repairing the screen on your iPhone 12 requires precision and close attention to detail. We’ve crafted a comprehensive step-by-step guide to walk you through the entire screen repair process to simplify the process.
Before starting, we recommend watching this quick video for a visual overview of the key steps and essential points to remember. After watching, scroll down to access the detailed instructions, which include helpful tips to guide you through each phase and ensure a smooth, successful iPhone 12 screen replacement.
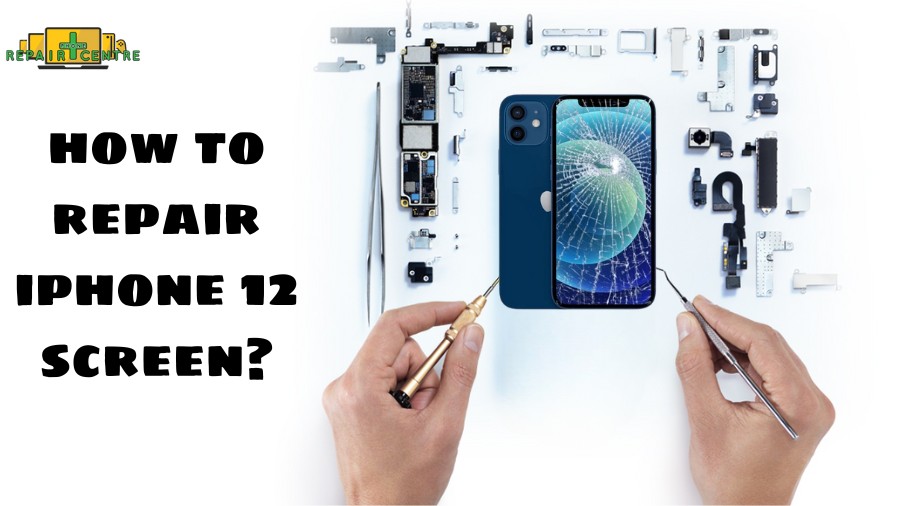
Step 1: Unscrew the pentalobe screws
- Turn off your iPhone before starting the disassembly process.
- Remove the two pentalobe P2 screws, each 6.75 mm in length, located at the bottom edge of the iPhone.
- Opening the iPhone’s display will compromise its waterproof seals. Have replacement seals ready before proceeding beyond this step, or ensure you prevent liquid exposure if reassembling your iPhone without replacing the seals.
Warning: Ensure your iPhone battery is discharged below 25% before starting. A fully charged lithium-ion battery can ignite or explode upon accidental puncture.
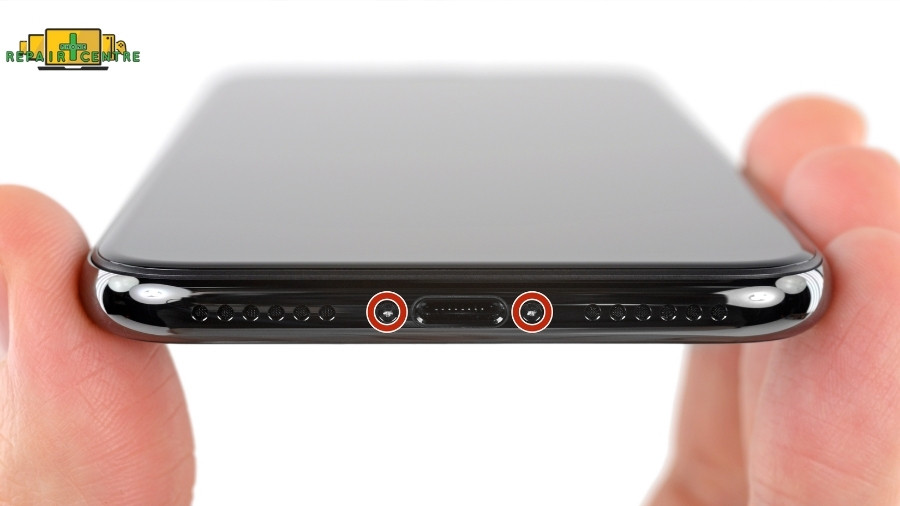
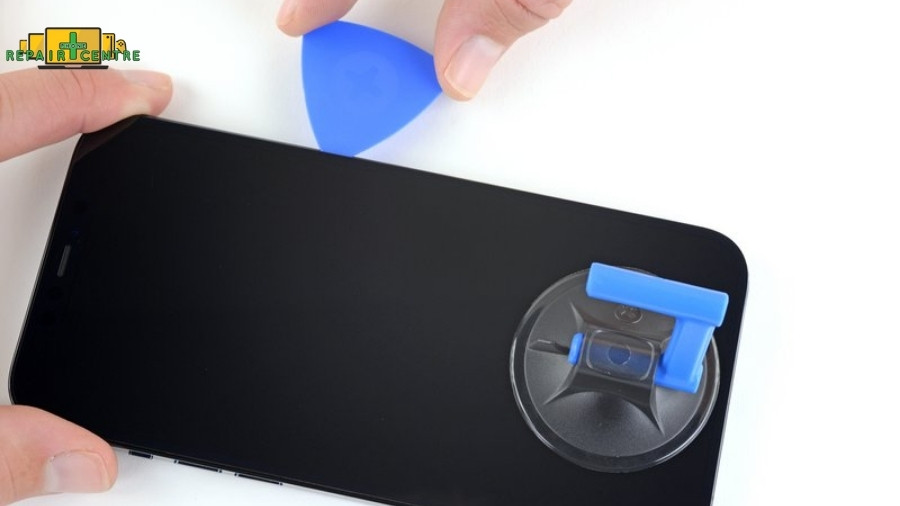
Step 2: Prepare your opening tools
- Preparing your opening pick correctly is crucial to ensuring your device remains undamaged. Measure 3 mm from the tip and mark it with a permanent marker.
- Alternatively, tape a coin to the pick, positioning it 3 mm from the tip. This method helps prevent over-insertion, which could harm your device.
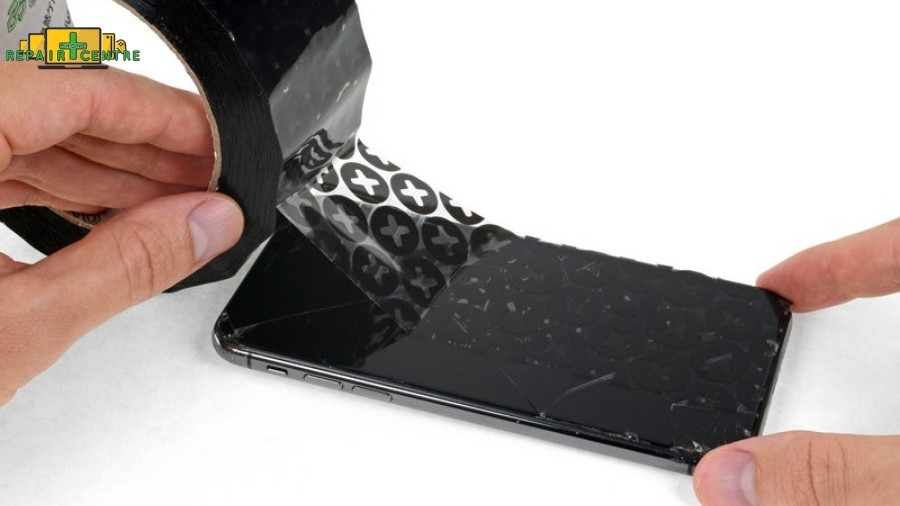
Step 3: Secure cracked screens
- If your iPhone screen is cracked, mitigate further damage during repair by covering it entirely with overlapping strips of clear packing tape. This step helps contain glass fragments.
- Wear safety glasses to protect your eyes from any loose glass during the repair process. If the suction cup fails to adhere in later steps, improvise by folding duct tape into a handle for lifting the screen, or consider using superglue if necessary.
Step 4: Heat the bottom edge
Utilize a hair dryer or heat gun to warm the bottom edge of your iPhone for approximately 90 seconds or until the screen becomes too hot to handle comfortably.

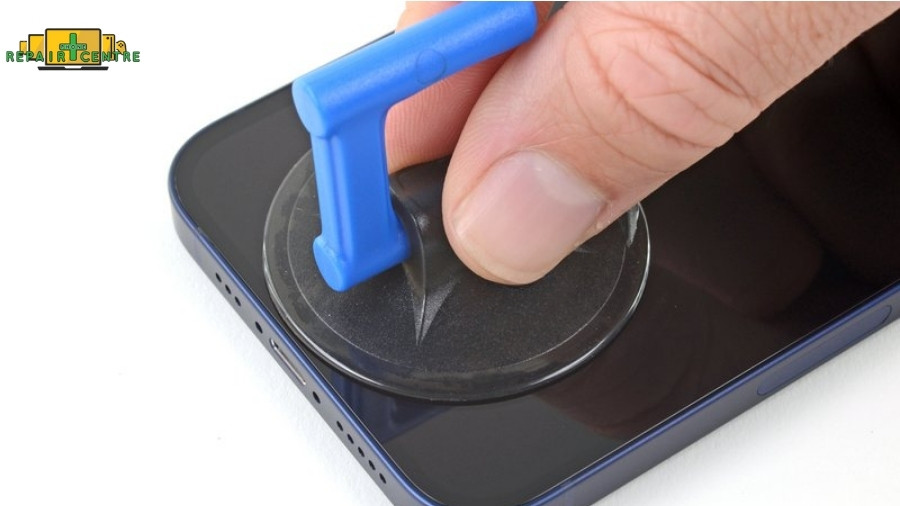
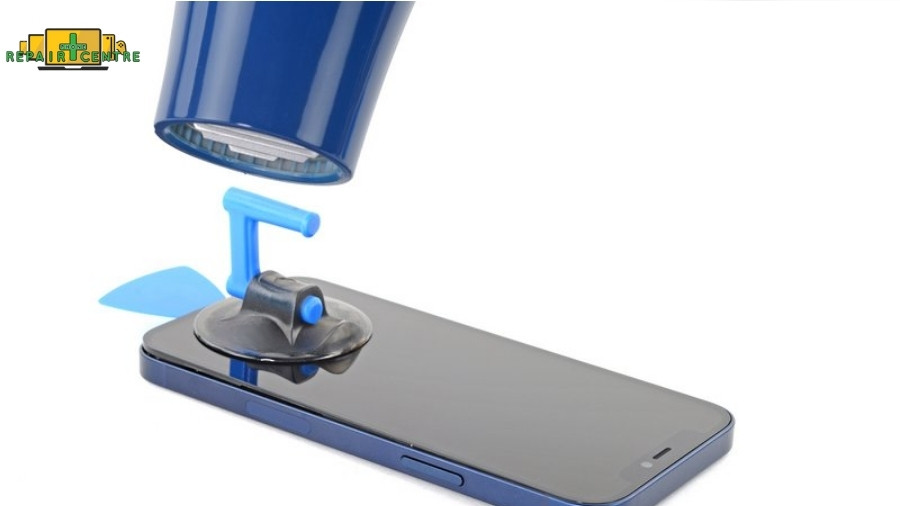
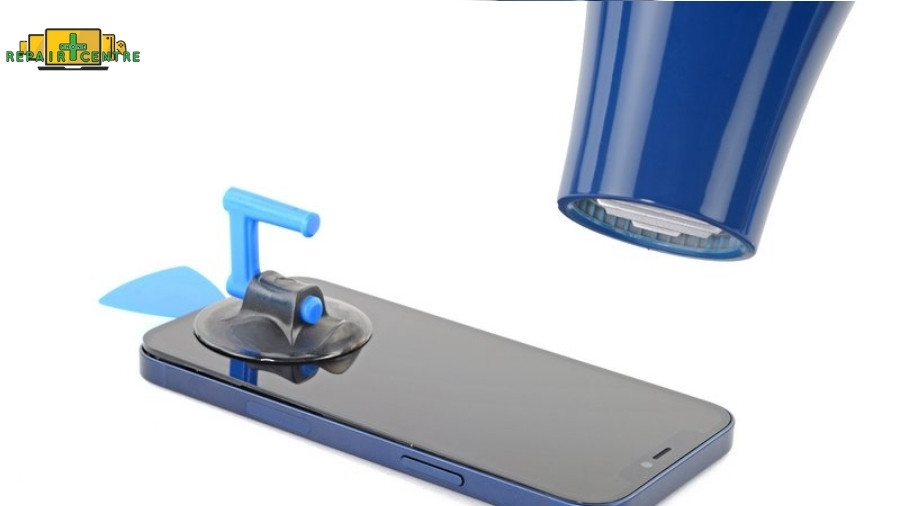
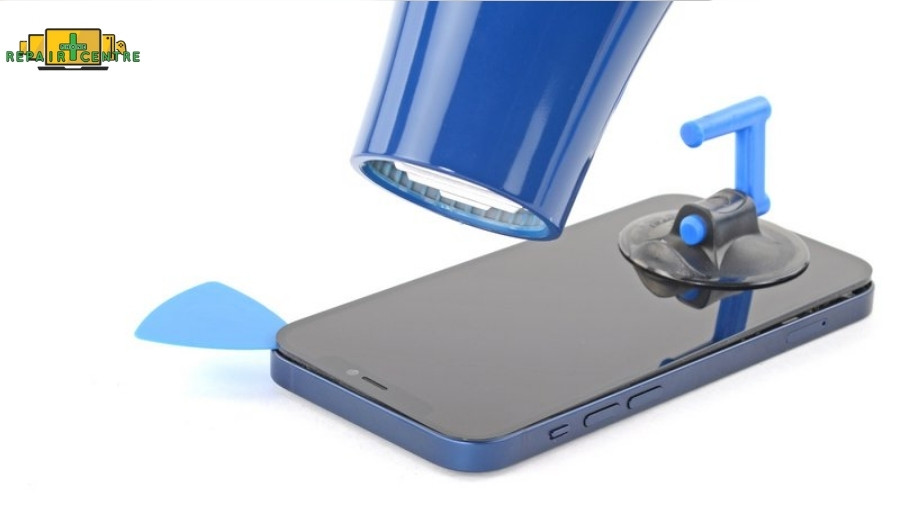
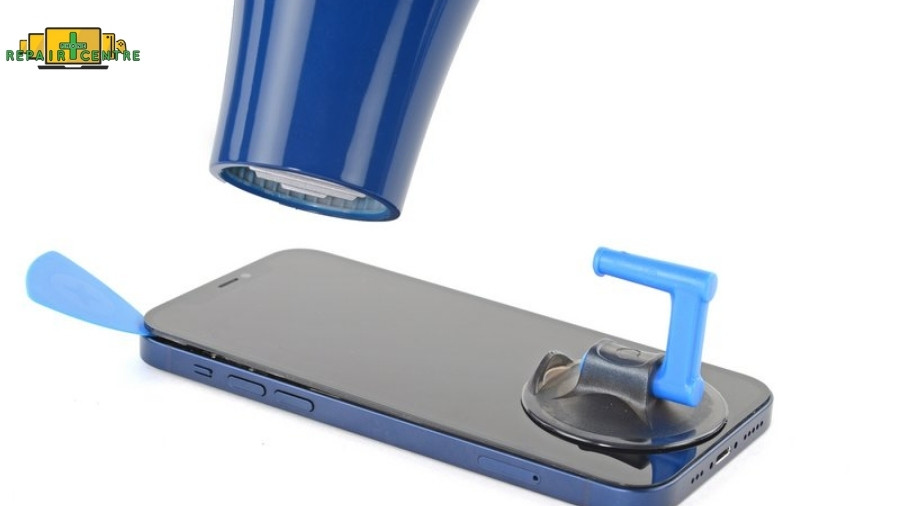
Step 5: Apply a suction cup
Apply a single suction cup to the phone’s bottom edge, avoiding direct placement on the glass edge.
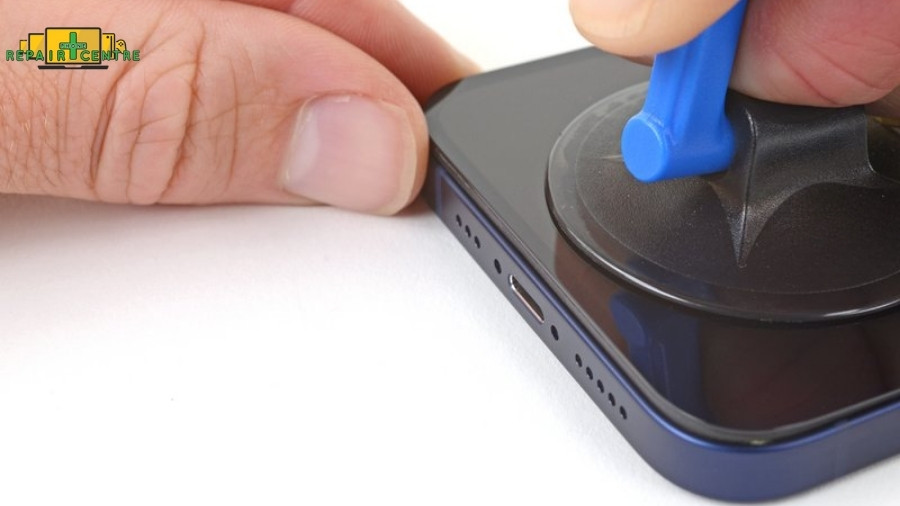
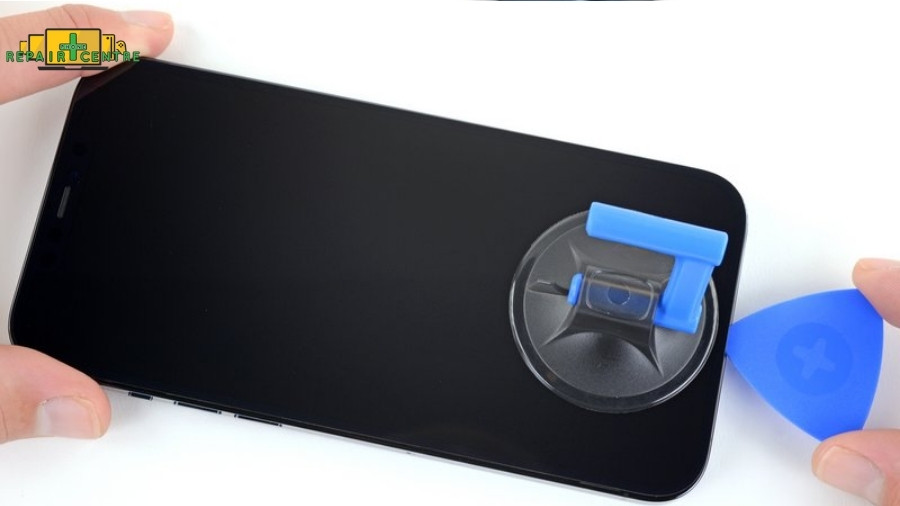
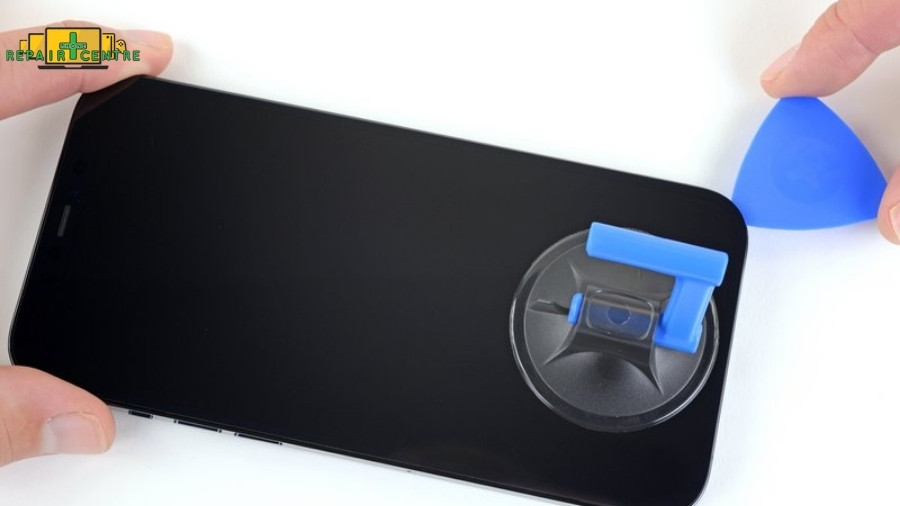
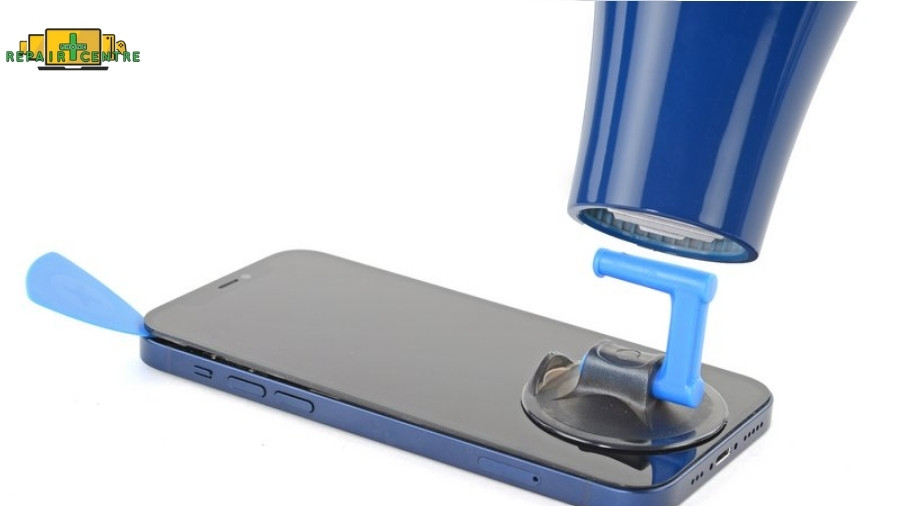
Step 6: Lift the screen slightly
- Pull up on the suction cup with consistent pressure to create a small gap between the screen and the frame. Once the gap is established, insert an opening pick under the plastic bezel.
- The adhesive holding the screen is robust, requiring significant force to create the initial gap. If resistance is encountered, apply more heat and gently maneuver the screen to weaken the adhesive further.
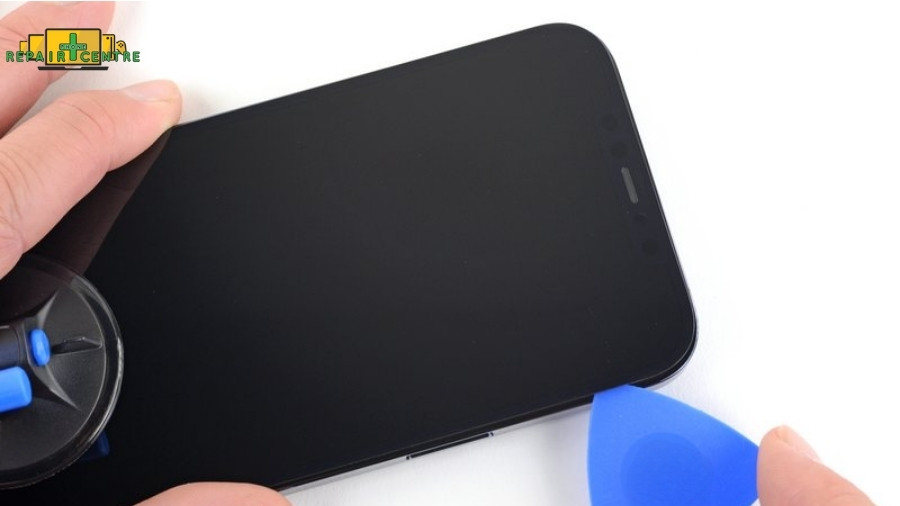
Step 7: Heat the right edge
Use a hair dryer to heat the right edge of the iPhone (the side with the power button) for about 90 seconds or until the screen feels too hot to touch.
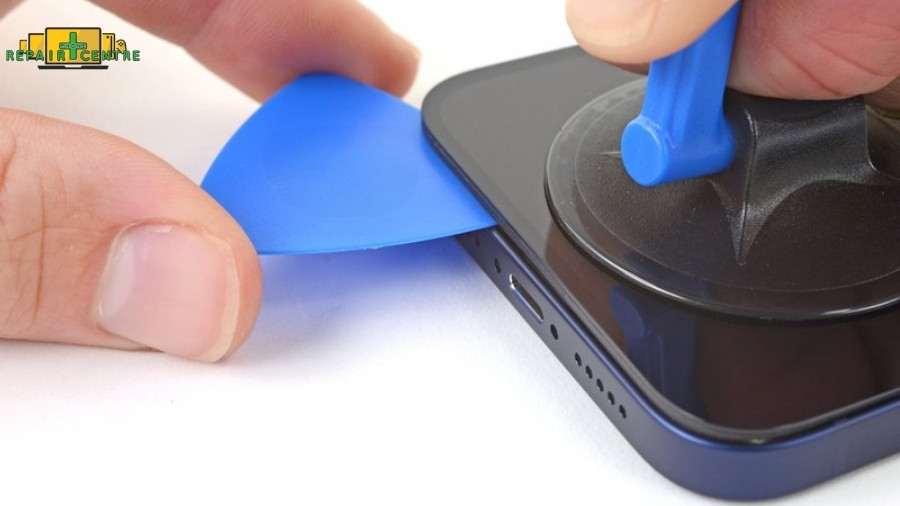
Step 8: Separate the right adhesive
- Slide the opening pick along the bottom right corner of the iPhone to separate the adhesive. Continue along the right edge until reaching the top right corner, ensuring not to insert the pick more than 3 mm to avoid damaging internal components.
- Leave the pick in place at the top right corner.
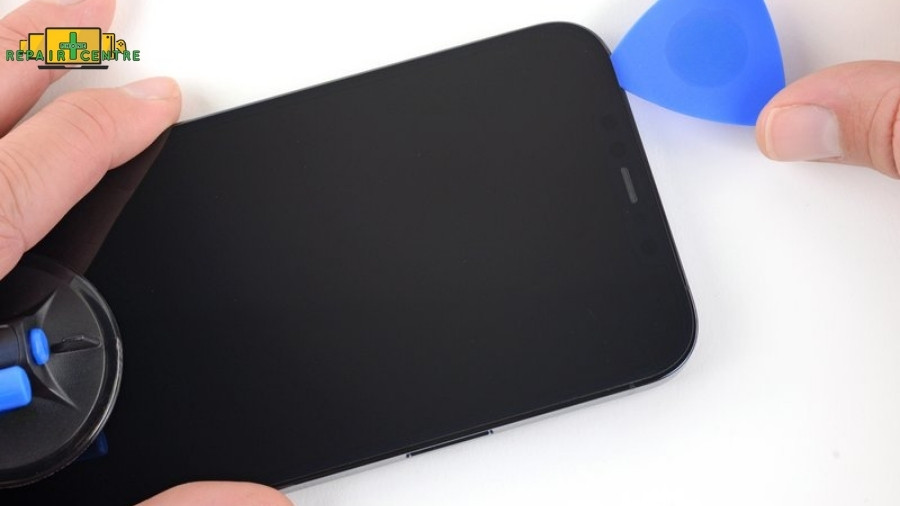
Step 9: Heat the top edge
Apply heat to the top edge of the iPhone for approximately 90 seconds or until the screen becomes too hot to touch.
Step 10: Separate the top adhesive
- Slide the opening pick around the top right corner of the iPhone to separate the adhesive. To prevent damage to the top sensors, avoid inserting the pick more than 3 mm.
- Leave the pick in place at the top left corner.

Step 11: Heat the left edge
Heat the left edge of the iPhone for about 90 seconds or until the screen feels too hot to handle.
Step 12: Avoid the left edge
Do not insert the pick along the iPhone’s left edge, as delicate cables are present.
Step 13: Releasing the Left Adhesive
- Insert a second opening tool into the lower left corner of the iPhone.
- Twist both tools simultaneously to loosen the adhesive along the left edge. If necessary, apply gentle heat to aid in this step.

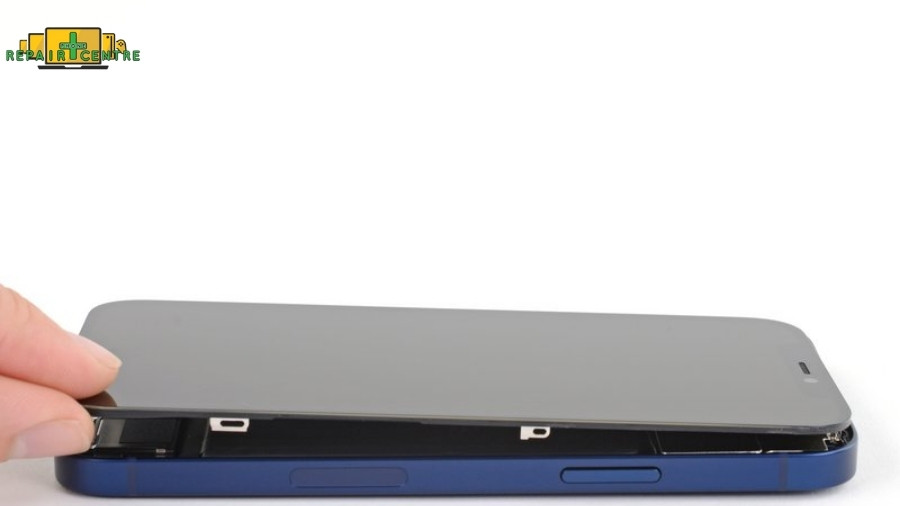
Step 14: Opening the iPhone Cover
- Orient the iPhone so the right edge is facing towards you.
- Open the device like a book cover, starting from the right side.
- Be cautious not to fully detach the display, as it remains connected to the logic board via fragile ribbon cables.
- Prop the display against a stable object to keep it propped up securely.
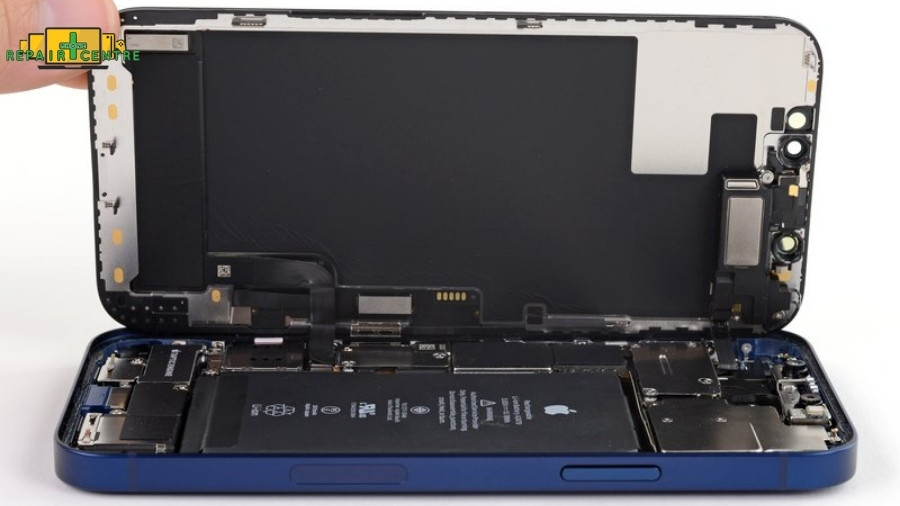
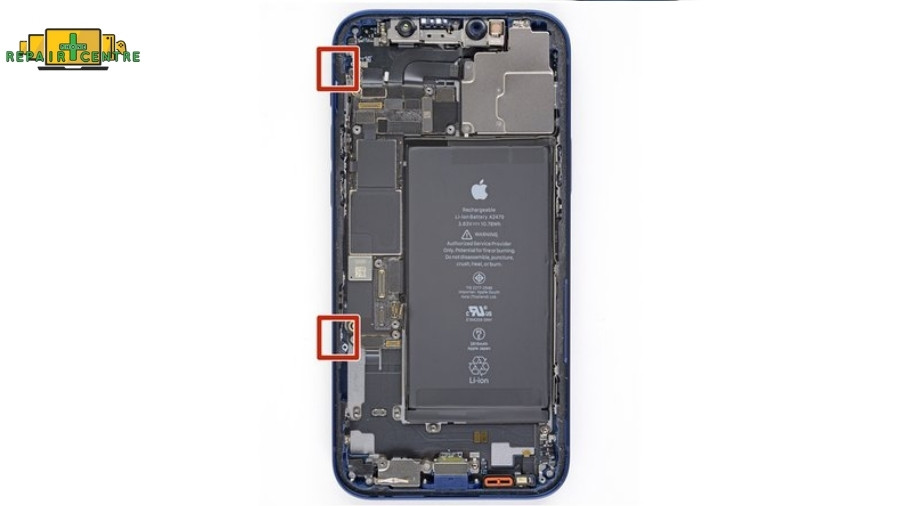
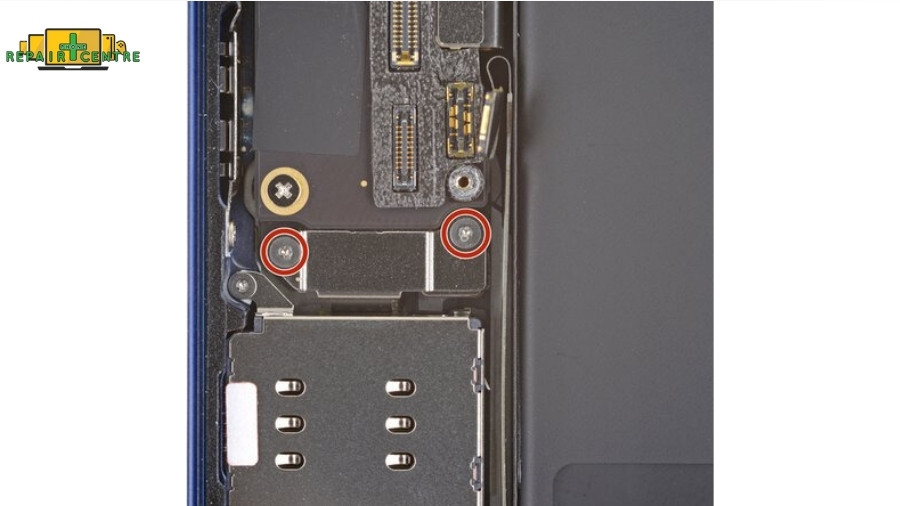
Step 15: Unscrewing the Battery and Display Connectors
- Remove two Y000 screws, each 1.1 mm in length, that secure the cover over the battery and display connectors. It’s crucial to keep these screws safe for reassembly.
- Before closing the display, test all functionalities by powering on and then completely powering off your iPhone.
Step 16: Removing the Battery and Display Connector Cover
Detach and lift off the cover.

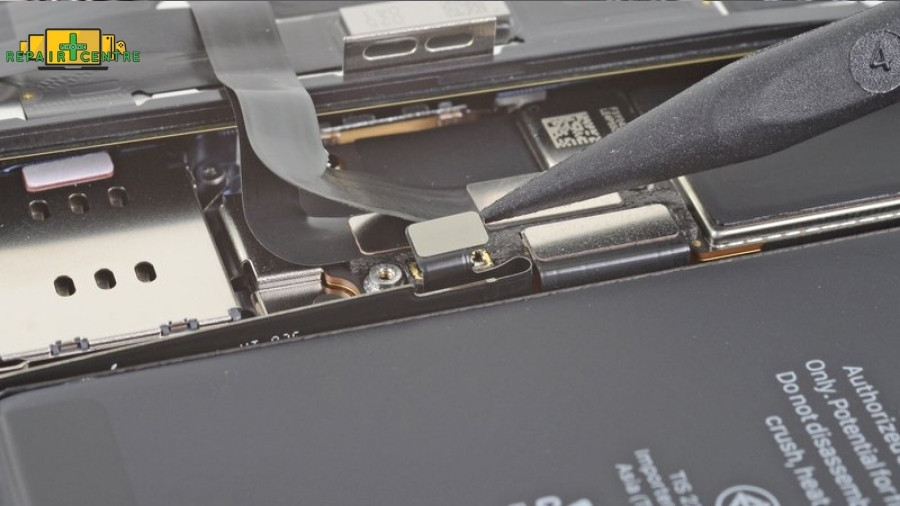
Step 17: Disconnecting the Battery
- Use a spudger or your fingernail to carefully disconnect the battery connector from its socket on the logic board.
- Take care not to damage the surrounding silicone seals. Gently bend the connector away from the logic board to prevent accidental power supply during the repair.
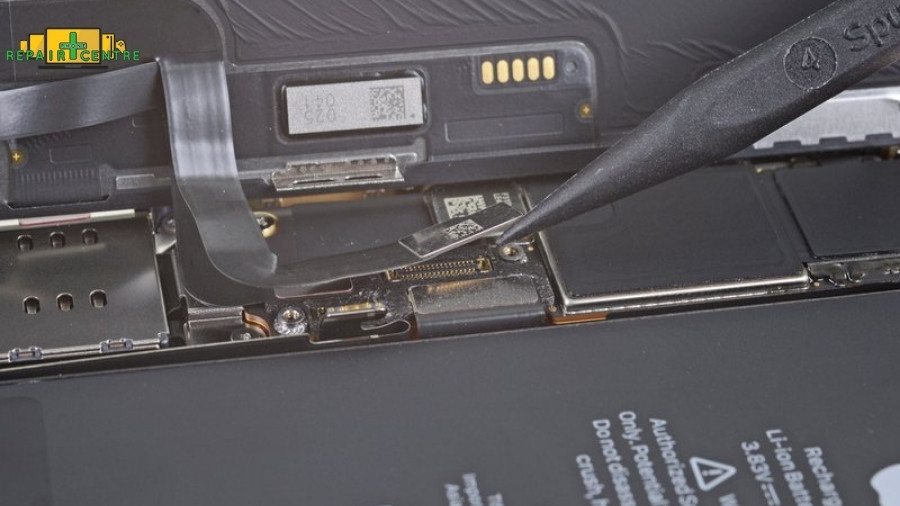
Step 18: Disconnecting the Display Cable
- Utilize a spudger or fingernail to disconnect the connector for the display cable.
- When reconnecting later, ensure proper alignment and press down on each side until it clicks into place, avoiding pressure on the middle to prevent damage to the pins.
Step 19: Disconnecting the Digitizer Cable
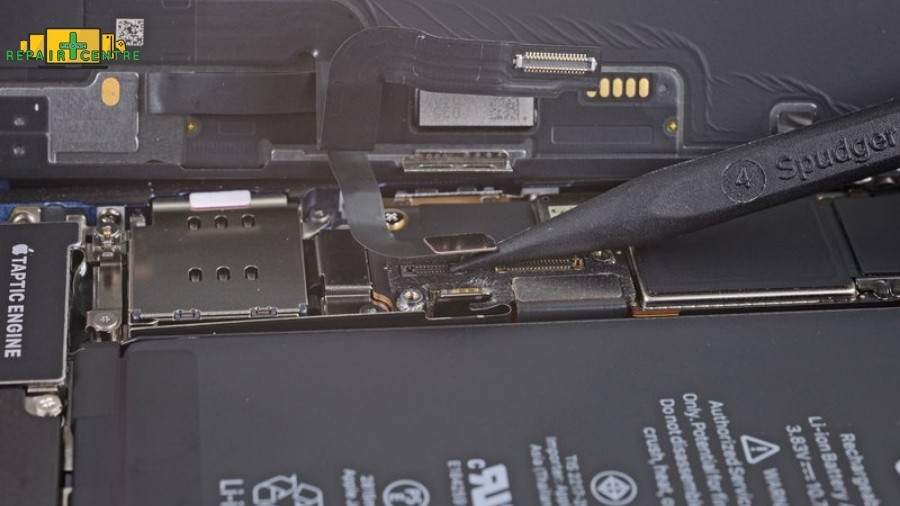
Employ a spudger or fingernail to detach the digitizer cable connector. Should any part of the screen remain unresponsive after repair, disconnect the battery and carefully reset this connector, ensuring it is free from dust or other obstructions.
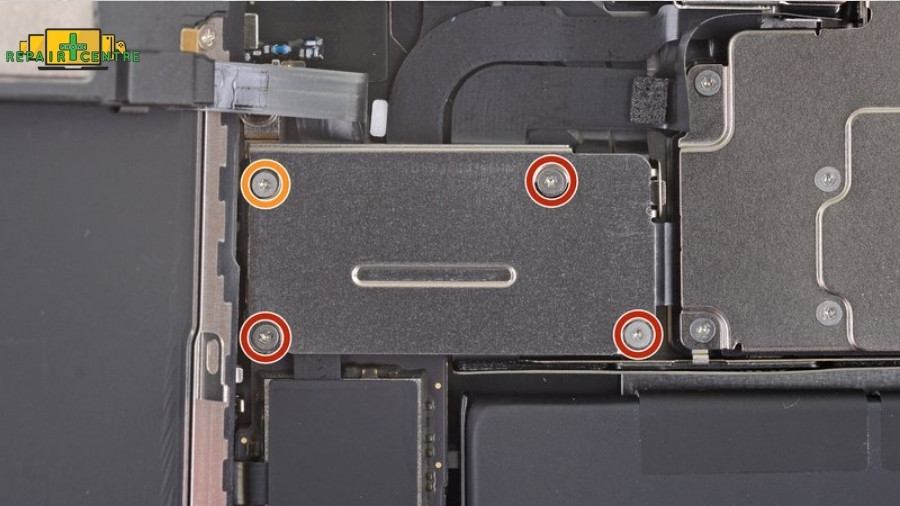
Step 20: Unscrewing the Front Sensor Connector Cover
Use a Y000 driver to remove four screws that secure the cover over the front sensor connector. Three of these screws measure 1.1 mm in length, while one is 1.4 mm long.
Step 21: Removing the Front Sensor Connector
- Lift the cover and swing it upwards from the left until the small clip on the right side disengages. Handle the cover with care as you remove it.
- During reassembly, insert the clip on the right edge into its slot first, then carefully hinge the rest of the cover into place.
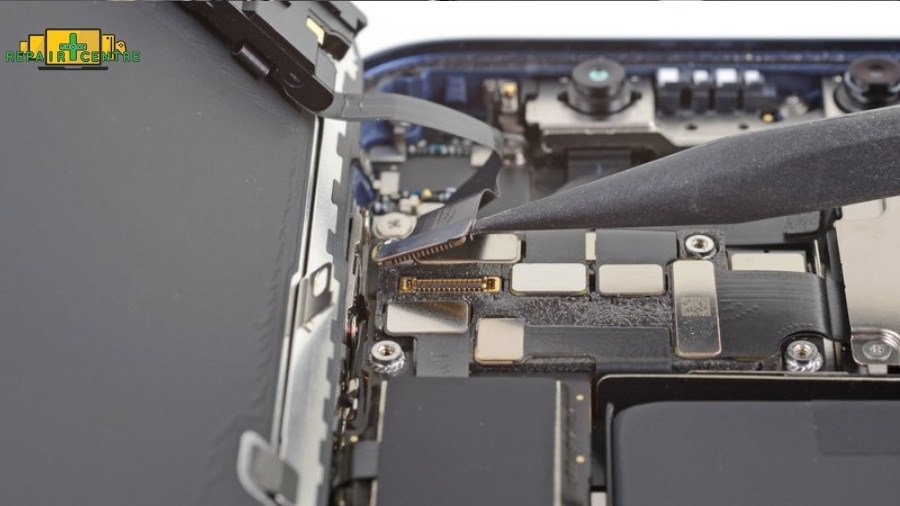
Step 22: Disconnecting the Front Sensors
Use a spudger or fingernail to disconnect the connector of the front sensor assembly cable.
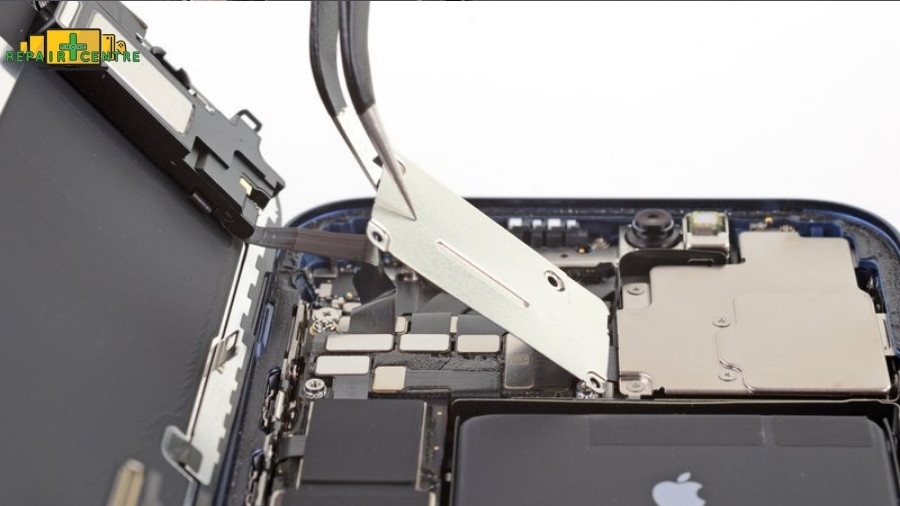
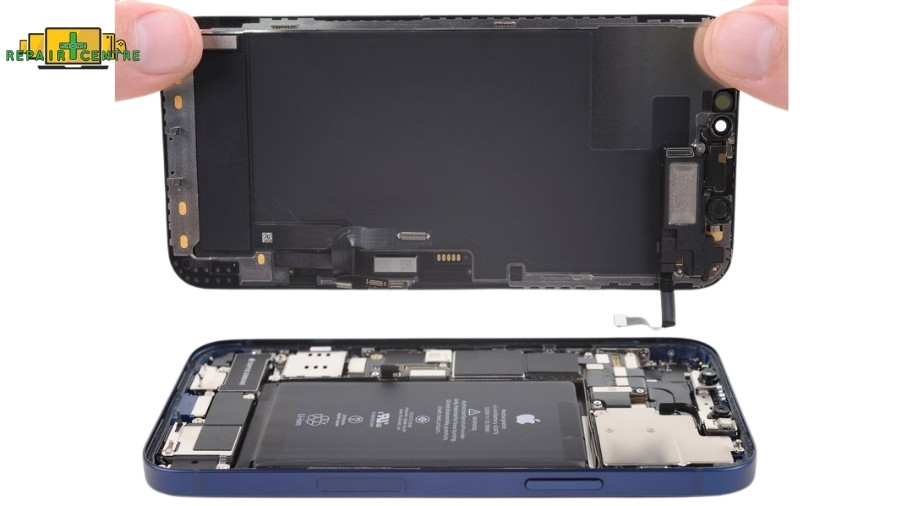
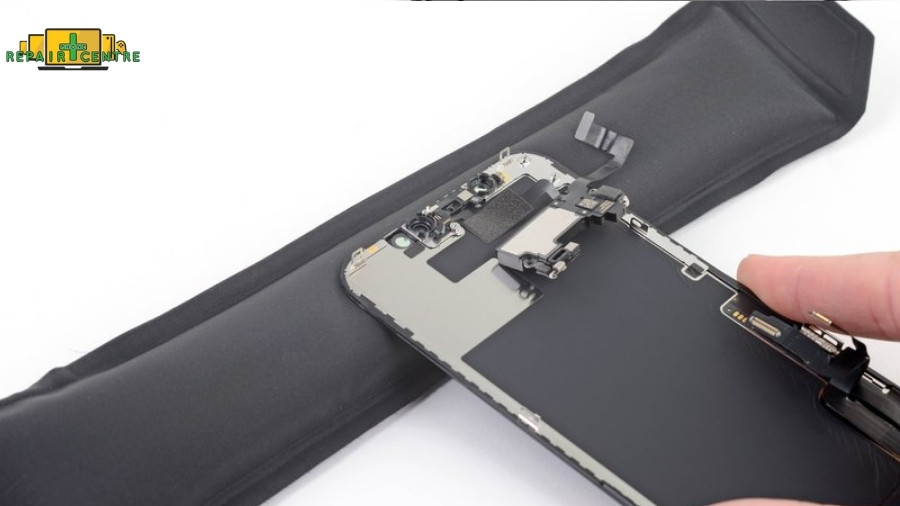
Step 23: Removing the Display Assembly
Carefully detach the entire display assembly. Stop at this step if planning to replace the waterproof adhesive around the display edges during reassembly.
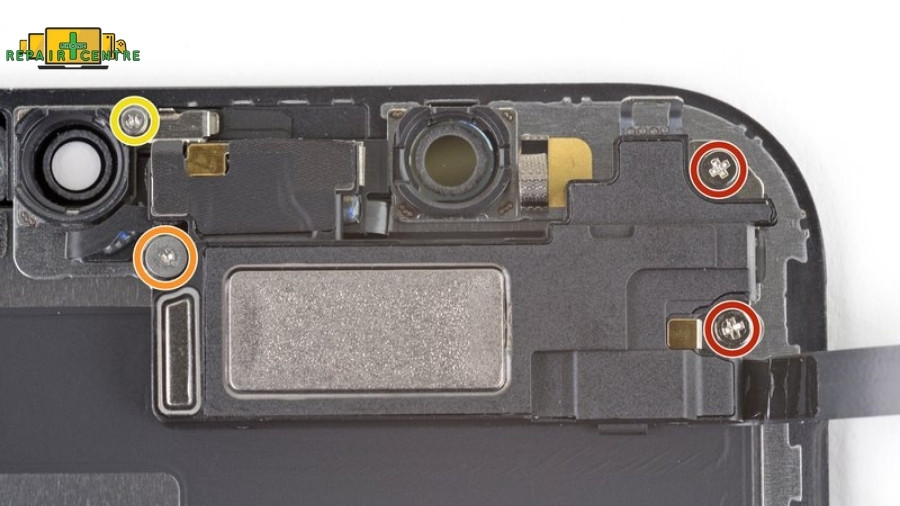
Step 24: Unscrewing the Speaker/ Sensor Assembly
Remove four screws securing the speaker/ sensor assembly to the back of the display. These include two 1.4 mm Phillips screws, one 1.7 mm shouldered Y000 screw, and one 1.2 mm Y000 screw.
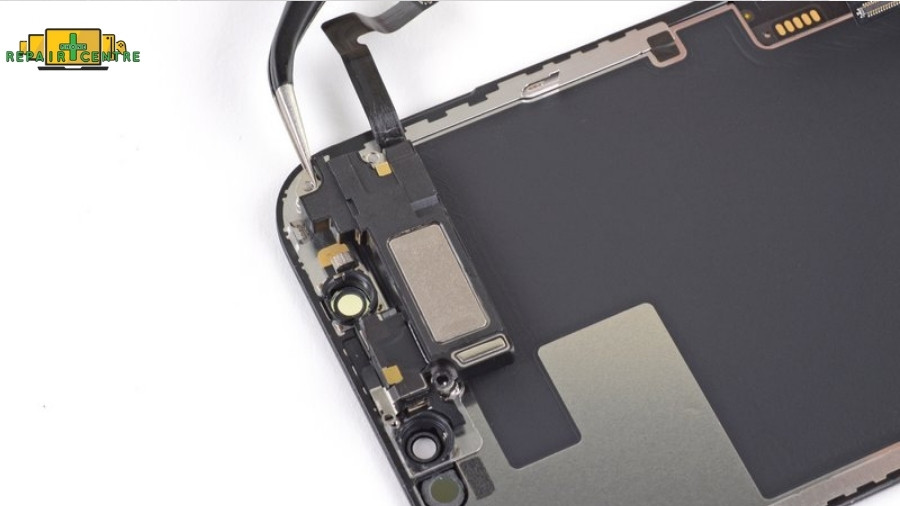
Step 25: Flipping the Speaker Assembly
- Gently lift the top edge of the earpiece speaker, which is lightly adhered.
- Carefully flip the speaker assembly downward and away from the top edge of the display. The speaker remains connected via a fragile ribbon cable, so handle it delicately.
Step 26: Heating the Top Edge of the Display
Apply heat to the top front portion of the display using a hair dryer or heat gun for 1-2 minutes. This softens the adhesive securing the sensors.
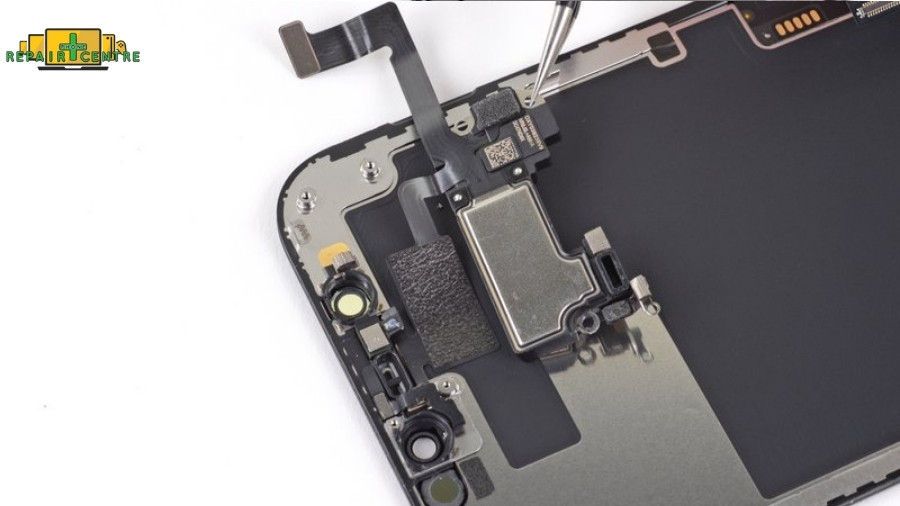
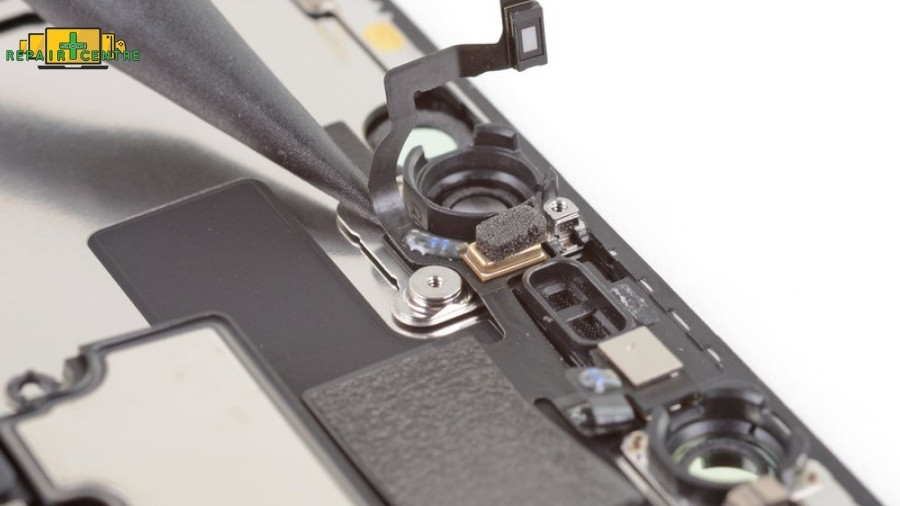
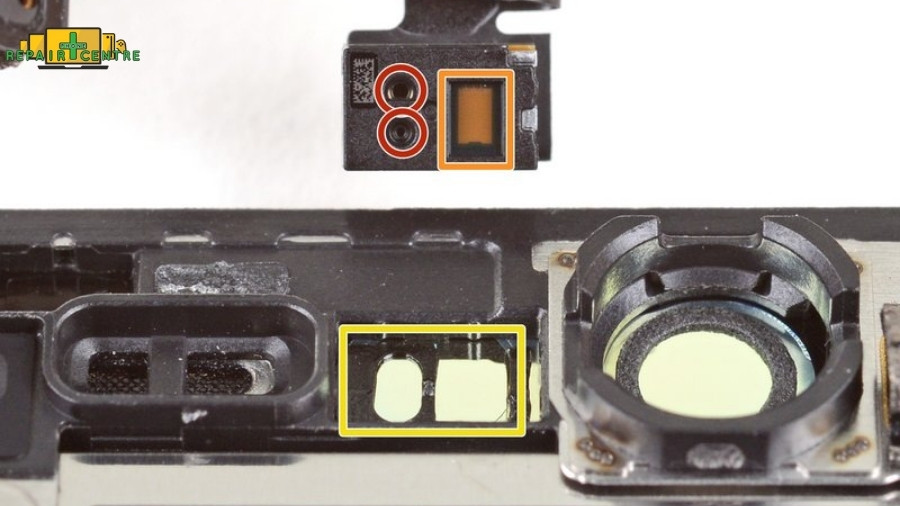
Step 27: Separating the Ambient Light Sensor
- Use a spudger to lift and separate the ambient light sensor from its notch in the front panel. Be careful not to damage the sensor’s ribbon cables.
- Continue sliding the spudger underneath the sensor and its cable to release the adhesive.
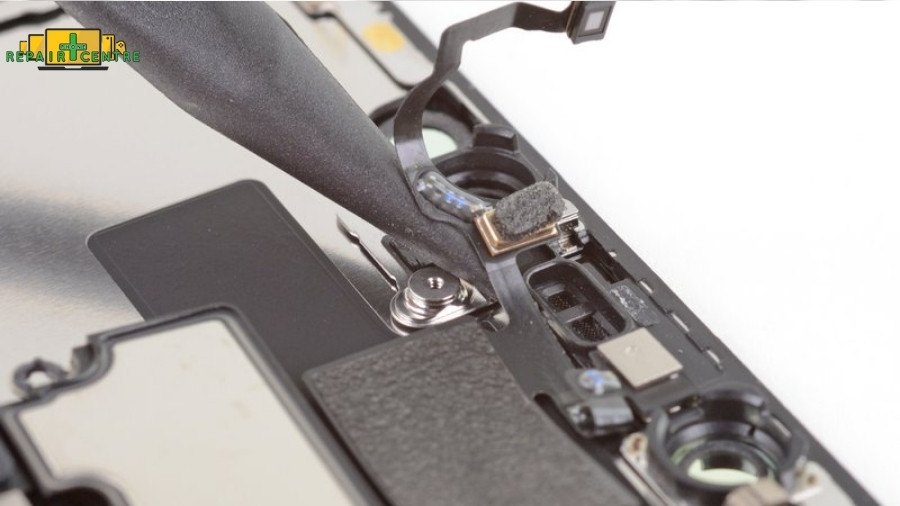
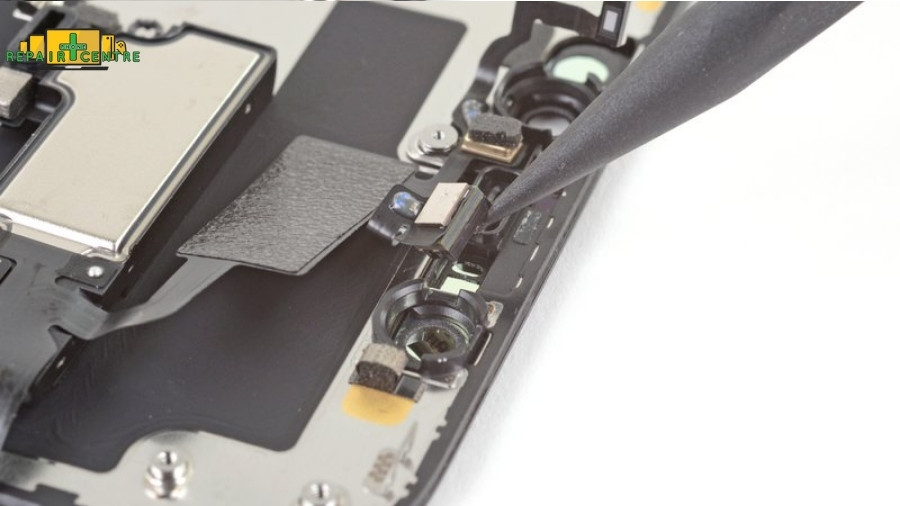
Step 28: Lifting the Microphone
Use a spudger to lift the microphone from its notch in the front panel.
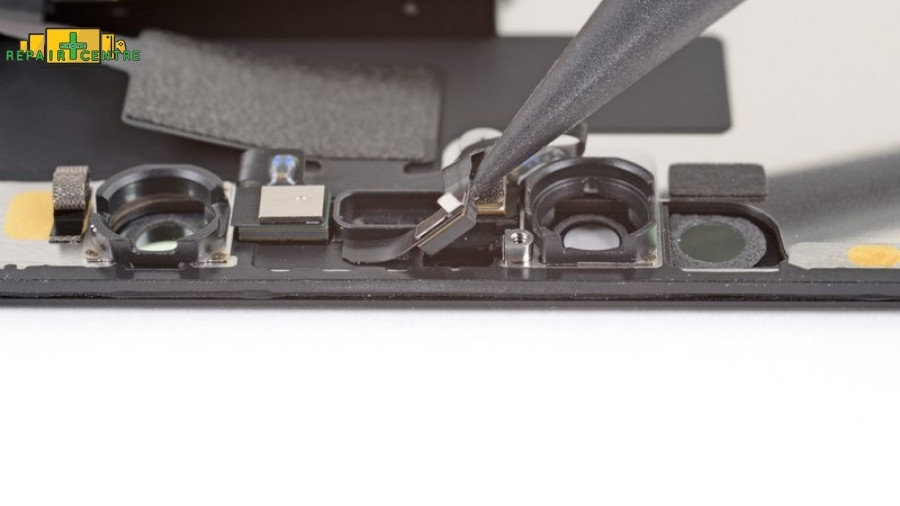
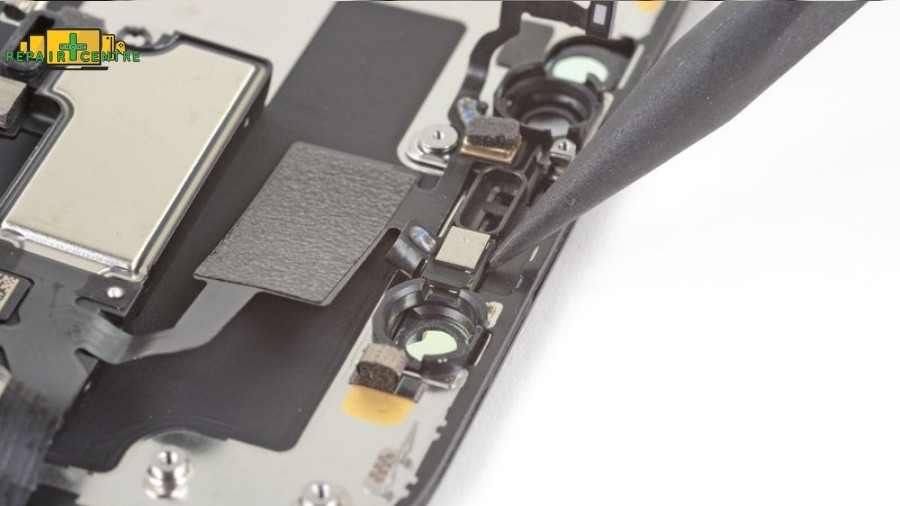
Step 29: Lifting the Proximity Sensor and Flood Illuminator Module
Using a spudger, lift the proximity sensor and flood illuminator module from its notch in the front panel.
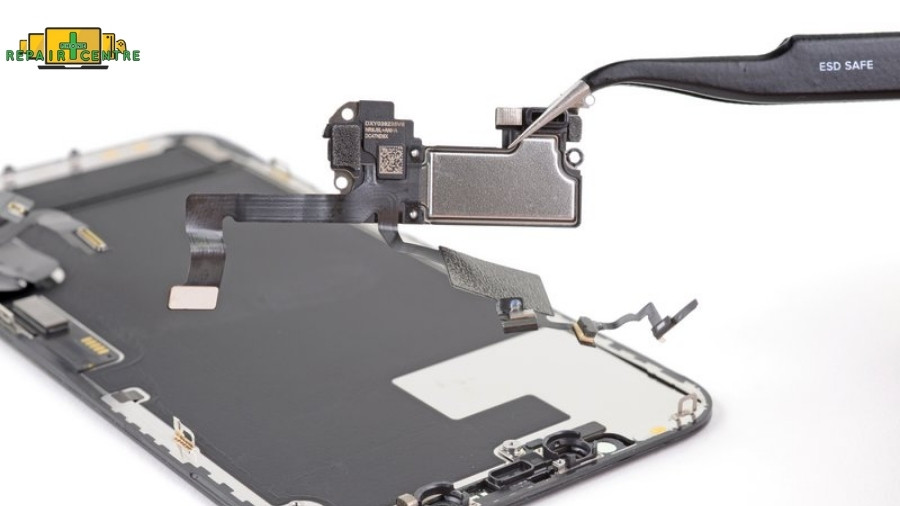
Step 30: Removing the Speaker and Front Sensor Assembly
- Remove the earpiece speaker and front sensor assembly.
- Ensure the black plastic module containing these components is correctly positioned during reassembly to avoid adhesive obstruction.
3. FAQs
How long does it take to replace the iPhone 12 screen?
Replacing the iPhone 12 display takes 30-60 minutes, depending on your experience level. Beginners may need more time to carefully follow each step and ensure all components are correctly reassembled.
Will replace the display void my iPhone 12 warranty?
Yes, performing a DIY repair or using non-Apple parts will void the device’s warranty. If your iPhone 12 is still under warranty, contacting Apple or an authorized service provider may be better to avoid voiding coverage.
Do I need to back up my data before replacing the screen?
It’s highly recommended that you back up your data via iCloud or iTunes before starting the repair. Although unlikely, accidents can happen during the process that might cause data loss or damage to the phone’s internal components.
Is replacing the iPhone 12 display worth it compared to professional repair?
Replacing the screen yourself can save money, especially if you’re familiar with DIY repairs. However, a professional repair offers peace of mind, especially if you’re concerned about damaging internal components. Compare the cost of a screen replacement kit with professional service to decide.