The iPhone 13 screen is an important factor that determines the user experience. If the screen is damaged, the main effects include unclear image display, reduced touch sensitivity, and possible pigmented edges. A damaged screen can also reduce the device’s aesthetics and resale value. Therefore, repairing or replacing the screen early will help maintain and improve the overall user experience of your iPhone 13. This blog will answer the question, ” How do I repair an iPhone 13 screen?”
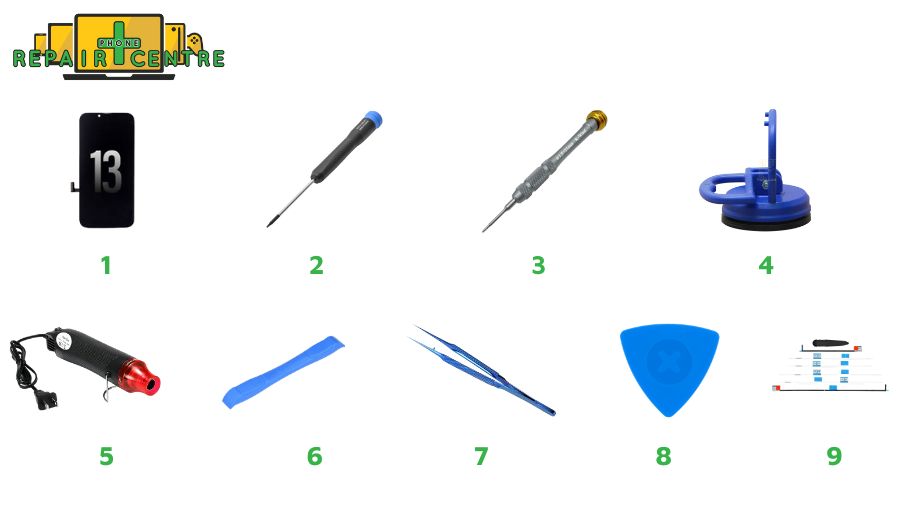
1. Tools and Materials Needed
- Replacement iPhone 13 screen
- Pentalobe (P2) screwdriver
- Phillips #000 screwdriver
- Suction handle
- iOpener (or heat gun/hairdryer)
- Spudger
- Tweezers
- Opening picks
- Adhesive strips
2. Step-by-Step Guide to Repairing Your iPhone 13 Screen
Repairing an iPhone 13 screen is a delicate task that requires precision and care. Our step-by-step guide can help you navigate the process. Before diving into the step-by-step guide, take a moment to watch this quick video clip. It will give you a visual overview of the process and key points to remember. Once you’re done, scroll down for detailed instructions that will walk you through each step with helpful tips to ensure success.
Step 1: Prepare Your Workstation and Remove the Pentalobe Screws
Before starting the display replacement on your iPhone 13, preparing your workstation and gathering the necessary tools is essential.
- Set Up a Clean, Organized Workspace: Ensure your workspace is well-lit and dust-free. Organize the tools and parts you’ll need
- Power Off the iPhone: To avoid any electrical damage or safety issues, power off the iPhone 13 by holding down the side and volume buttons and then sliding to power off.
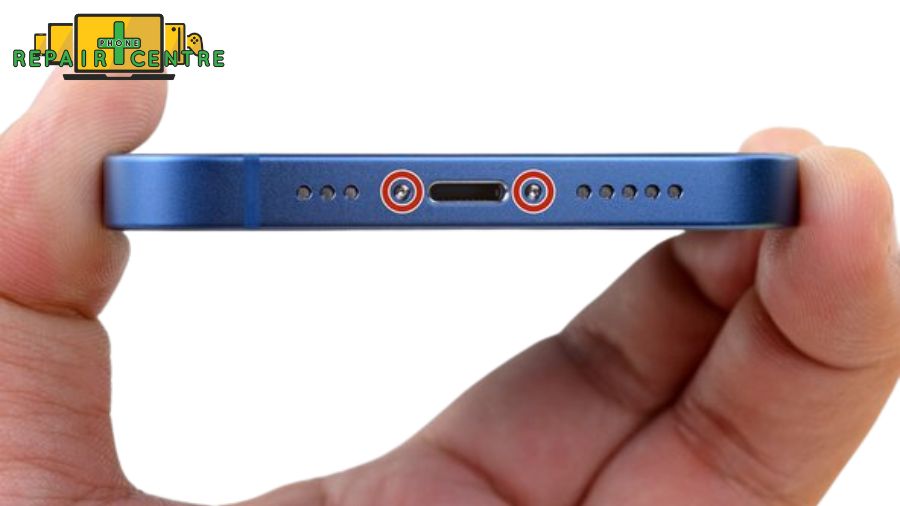
- Remove the Pentalobe Screws:
- At the bottom of your iPhone 13, near the charging port, locate two pentalobe screws.
- Use the P2 pentalobe screwdriver to remove both screws. Keep these screws in a safe place, as they are small and can be easily lost.
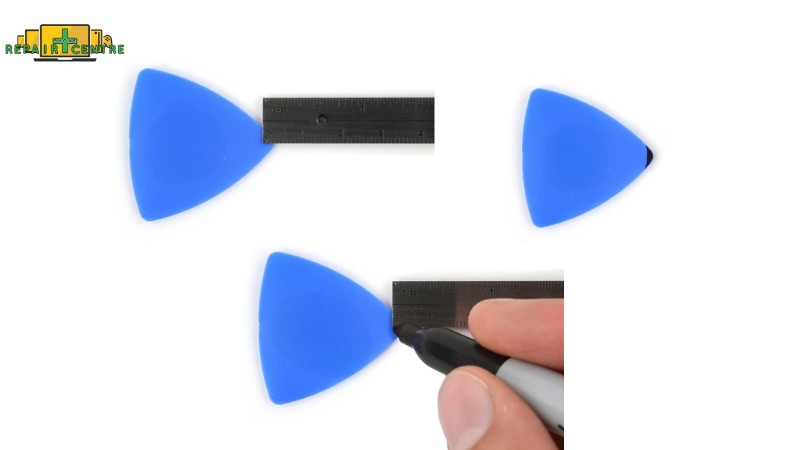
Step 2: Mark and Arrange Your Opening Picks
Measure 3 mm from the tip and mark each opening pick with a permanent marker.
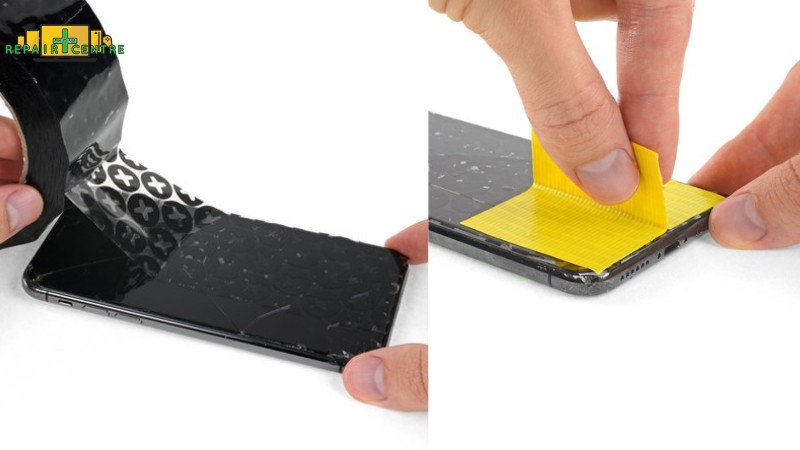
Step 3: Secure the Cracked Screen with Tape
Cover the entire face of the iPhone’s screen with overlapping strips of clear packing tape. If the suction cup doesn’t adhere in the upcoming steps, fashion a handle by folding a sturdy piece of tape (like duct tape) and use it to lift the screen instead. Note: Wear safety glasses to shield your eyes from any loose glass during the repair.
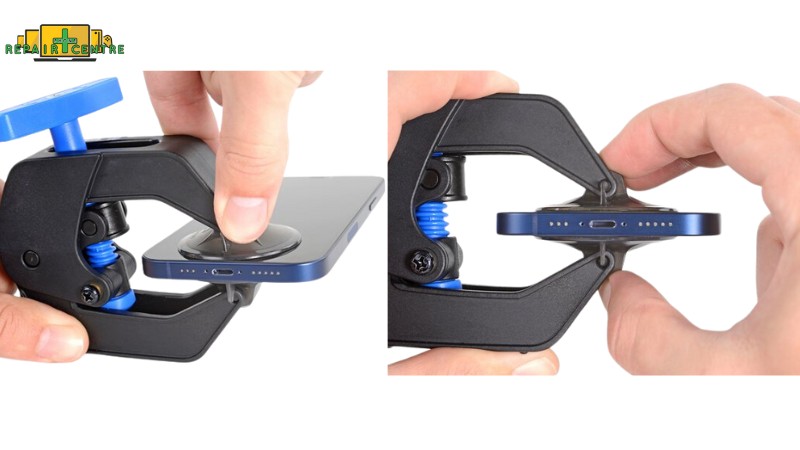
Step 4: Use the Anti-Clamp to Loosen the Display
- Pull the handle backward to unlock the arms of the Anti-Clamp.
- The arms can be slid over the iPhone’s left or right edge.
- Place one suction cup on the front and one on the rear of the iPhone, close to its bottom border.
- Squeeze the cups together to create suction in the desired area.
- Pull the blue handle forward to secure the arms.
- Rotate the handle in a clockwise direction 360 degrees or until the cups expand.
- Ensure the suction cups stay aligned with each other. If they shift out of alignment, slightly loosen the suction cups and reposition the arms.
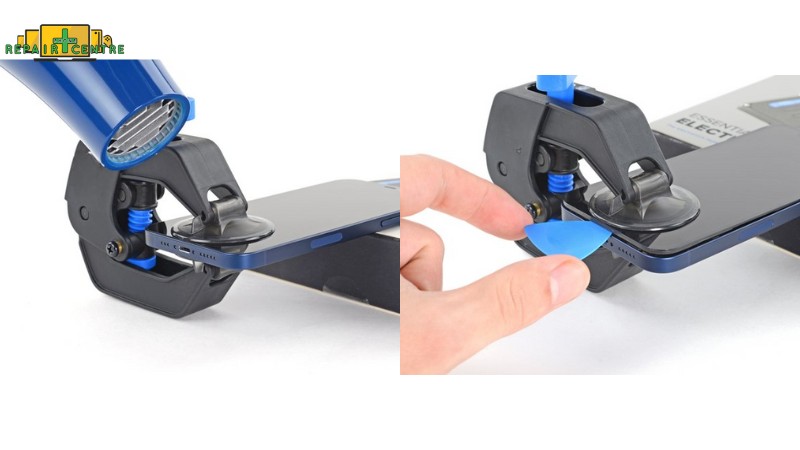
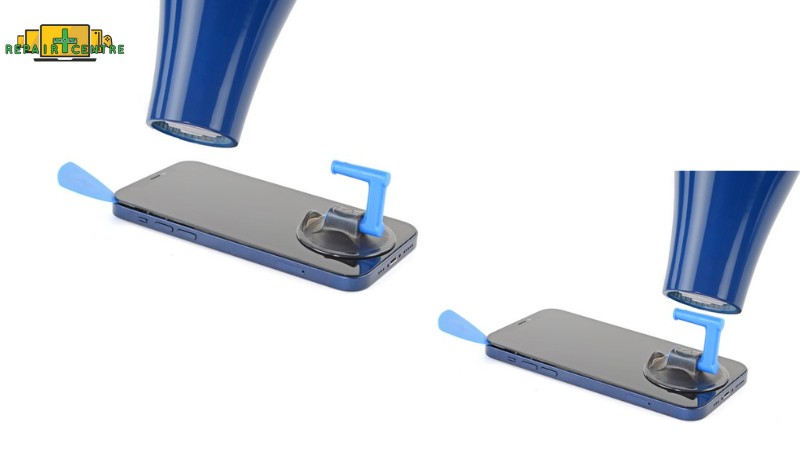
Step 5: Stabilize and Heat the Right Edge of the Screen
- Place your iPhone on a sturdy surface, such as a hardcover book, so it sits hands-free and parallel to the ground. This will facilitate easier handling in the subsequent steps.
- Use a hair dryer to apply heat along the bottom edge of the iPhone. The screen should become slightly too hot to touch.
- Wait for one minute to allow the adhesive to weaken and create an opening gap.
- Insert an opening pick under the plastic bezel of the screen once the Anti-Clamp has created a sufficiently large gap.
Note: Turn the clamp no more than a quarter turn at a time and wait one minute between turns. Allow the Anti-Clamp and time to assist in the process.
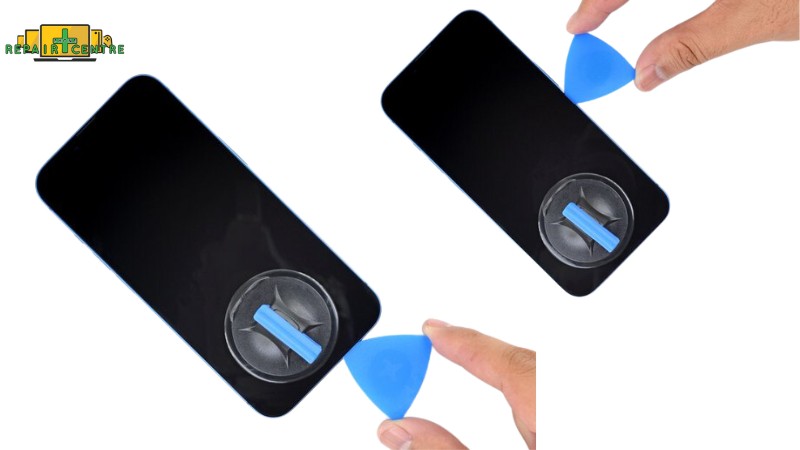
Step 6: Separate the Right Adhesive
- Gently slide the opening pick around the bottom right corner of the iPhone to loosen its adhesive.
- Continue sliding along the right edge until you reach the top right corner.
- Leave the pick inserted at the top right corner for now.
Note: Avoid inserting the pick more than 3 mm to prevent damage to internal components.
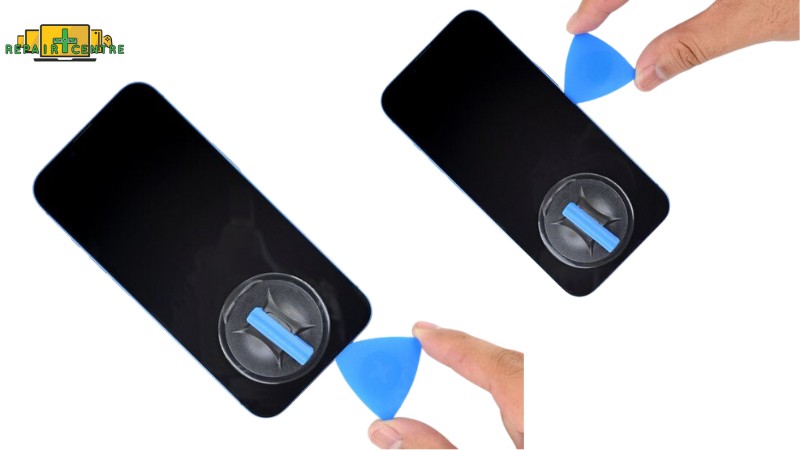
Step 7: Heat the Top and Left Edges of the Screen
Using a hairdryer, heat the iPhone’s top edge for ninety seconds or until the screen gets too hot to handle.
Step 8: Carefully Separate the Remaining Adhesive
- Slide the opening pick around the top right corner of the iPhone to separate the adhesive along the top edge.
- Leave the pick inserted at the top left corner for the next steps.
Note: Ensure the pick does not penetrate over 3 mm to avoid damaging top sensors.
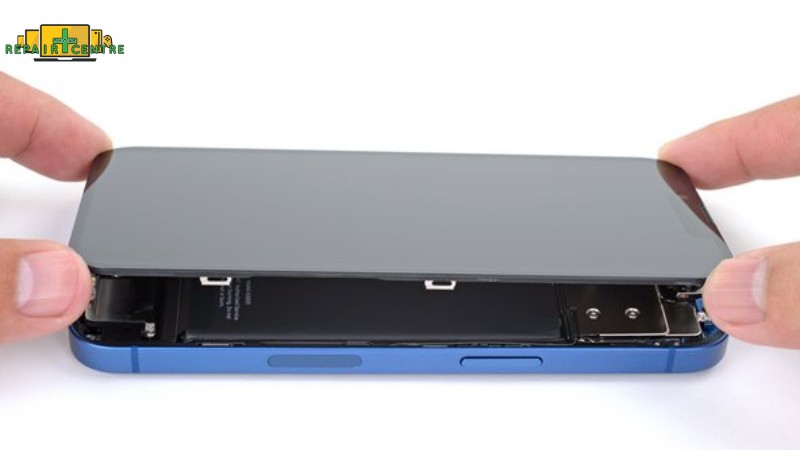
Step 9: Gently Open the iPhone 13 Screen
- If the suction handle is still attached, remove it now.
- Turn your iPhone so that the right side is facing you.
- Open the iPhone by gently swinging the display from the right side, like opening a book cover.
- Prop the display against a stable surface to keep it upright during the repair.
Note: The display is still attached to the iPhone’s logic board by thin ribbon connections, so don’t completely remove it.
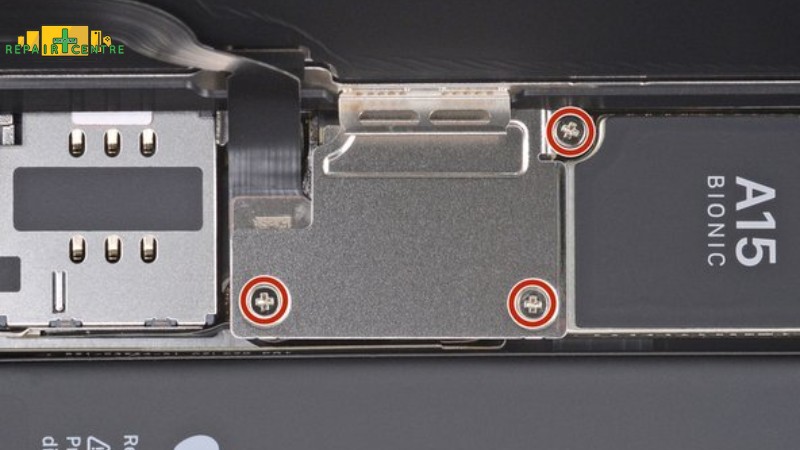
Step 10: Remove the Display and Battery Connector Covers
- Using a Phillips screwdriver, remove the three 1.3 mm screws securing the battery and display connector cover.
- Take off the cover.
Step 11: Disconnect the Battery and Display Cable
Disconnect the Battery
- Carefully pry the battery connector from its socket on the logic board using a spudger or clean fingernail.
- Gently bend the connector away from the logic board to prevent accidental contact and to prevent the phone’s power supply from being cut during repair.
Note: Avoid damaging the black silicone seal around this and other board connections, as they provide additional protection against water and dust intrusion.
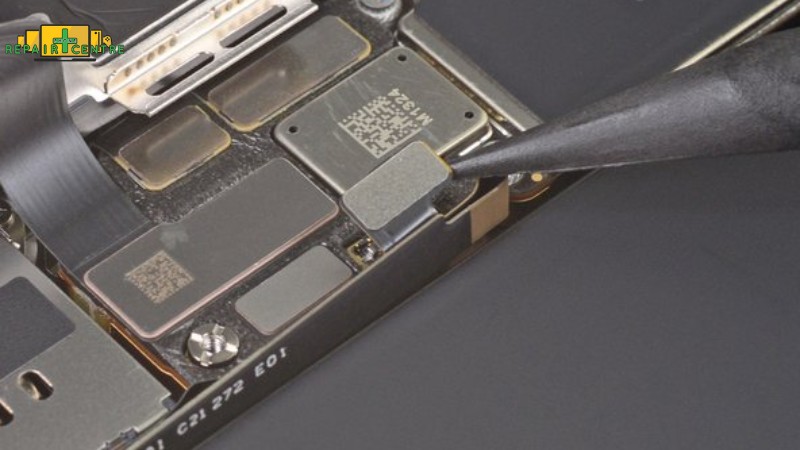
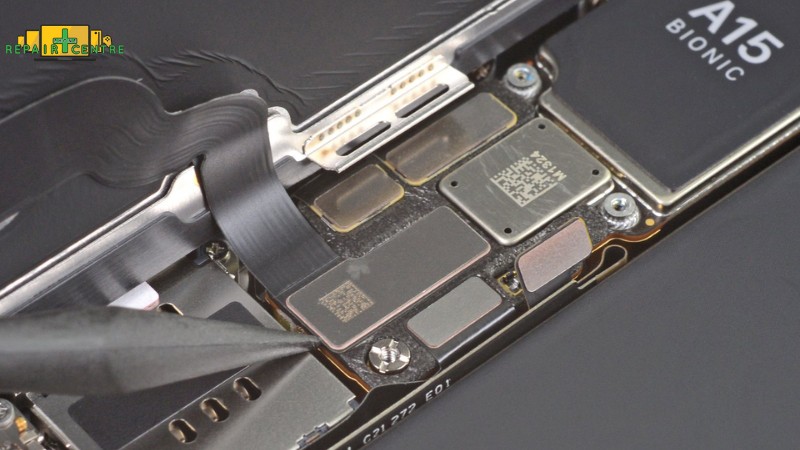
Disconnect the display cable
- Use a spudger or fingernail to disconnect the display cable connector.
Step 12: Remove and Transfer the Front Sensor Assembly to the New Screen
- Place an opening pick underneath the front sensor assembly’s left side.
- Gently slide the pick under the assembly to separate it from the frame.
When transferring the assembly to a new screen, follow these steps:
- Ensure the sensors are correctly aligned in their slots on the frame.
- Use Tesa tape to reattach any sections of the assembly that have lost their adhesive properties.
Please note: This guide assumes some technical expertise in phone repairs. If you feel uncertain or uneasy about the process, it is advisable to seek professional guidance. 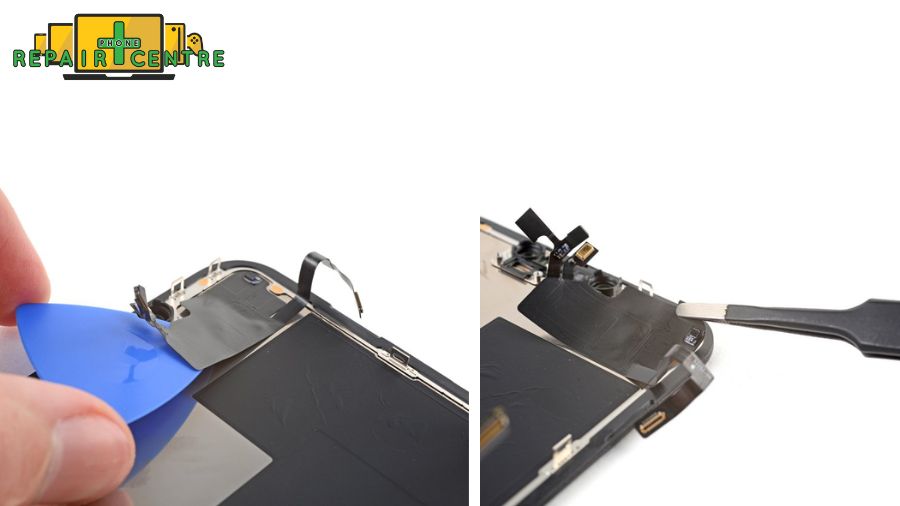
3. FAQs
Is It Worth Replacing the iPhone 13 Screen Yourself?
Replacing the screen of an iPhone 13 yourself can be worth it. Still, there are a few important factors to consider before deciding whether it’s the best choice for you: cost savings, difficulty level, warranty, quality of parts, and time. So the answer is yes, if you’re comfortable with technical tasks, want to save money, and understand the risks involved. The answer is no if you’re concerned about voiding your warranty, damaging components like Face ID, or using lower-quality parts. In such cases, it’s best to use a professional repair service.
Can I Replace My iPhone 13 Screen Without Professional Help?
Yes, you can replace your iPhone 13 screen without professional help, but it requires caution. You’ll need the right tools and a good understanding of the repair process. While doing it yourself can save money, it also comes with risks such as damaging internal components, voiding your warranty, and possibly losing features like Face ID. If you’re experienced with phone repairs, it’s possible. However, if you’re unsure, professional help is a safer option to ensure quality and avoid further damage.
How Long Does It Take to Replace an iPhone 13 Screen?
Replacing an iPhone 13 screen DIY typically takes around 30 minutes to 2 hours, depending on your experience level and the tools you have. The process might be faster for those familiar with phone repairs, closer to 30-45 minutes. However, it may take longer if you do it for the first time, as you’ll need to follow instructions carefully to avoid damaging the phone’s internal components. The right tools and a well-organized workspace can also impact the process’s length.
For professional services, replacing an iPhone 13 screen typically takes 1 to 3 hours, depending on the repair shop’s schedule and your appointment. Some service centers, like Phone Repair Centre, may offer same-day repairs if the parts are available. You can check the iPhone 13 Screen Replacement service through this Link.
What Are the Risks of Replacing an iPhone 13 Screen at Home?
Replacing an iPhone 13 screen at home carries several risks, including:
- Damaging Internal Components: The iPhone 13 has fragile parts like the Face ID sensor, cables, and connectors that can easily be damaged if not handled correctly.
- Voiding the Warranty: Opening the phone yourself voids any remaining Apple warranty, meaning future repairs won’t be covered.
- Lower Quality Parts: DIY repair kits often use third-party screens, which may not match the original regarding color accuracy, touch sensitivity, or durability.
- Loss of Features: Incorrect installation can result in losing features like True Tone display or Face ID functionality.
- Increased Repair Costs: If mistakes are made, fixing additional damage can lead to higher repair costs, especially if professional help is eventually needed.
These risks make professional repairs a safer option unless you’re experienced in phone repairs.
Addressing “how to repair an iPhone 13 screen” is crucial for ensuring the device’s functionality, safety, and long-term durability. Hope the above repair instructions are useful to you. If you need an expert to repair your iPhone 13 screen, contact the Repair Center immediately!